
There are a lot of different versions of rappelling out there. I did some research to compile them all and give you a comprehensive guide.
The different types of rappelling are:
- Standard rappels
- Australian rappels
- Hanging rappels
- Military rappels
- Simul-rappel
- Fireman’s belay
- Tandem rappels
It’s important to know about the different types of rappelling so that you’re aware of what’s appropriate for what situations, and any differences in the gear you need to carry. So, let’s get into it!
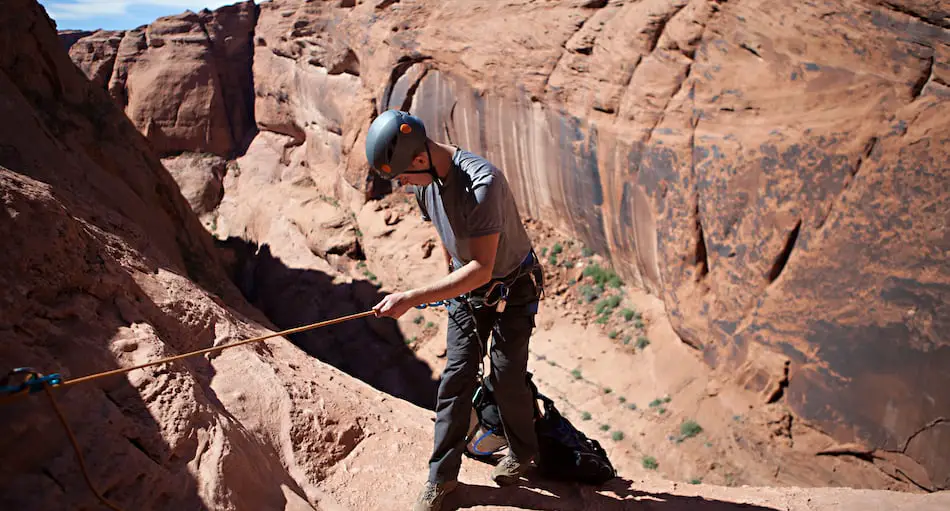
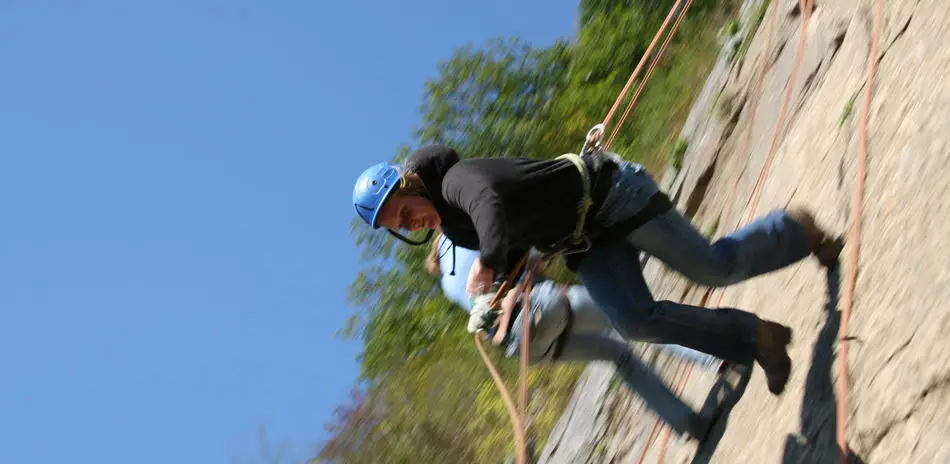
Standard Rappels
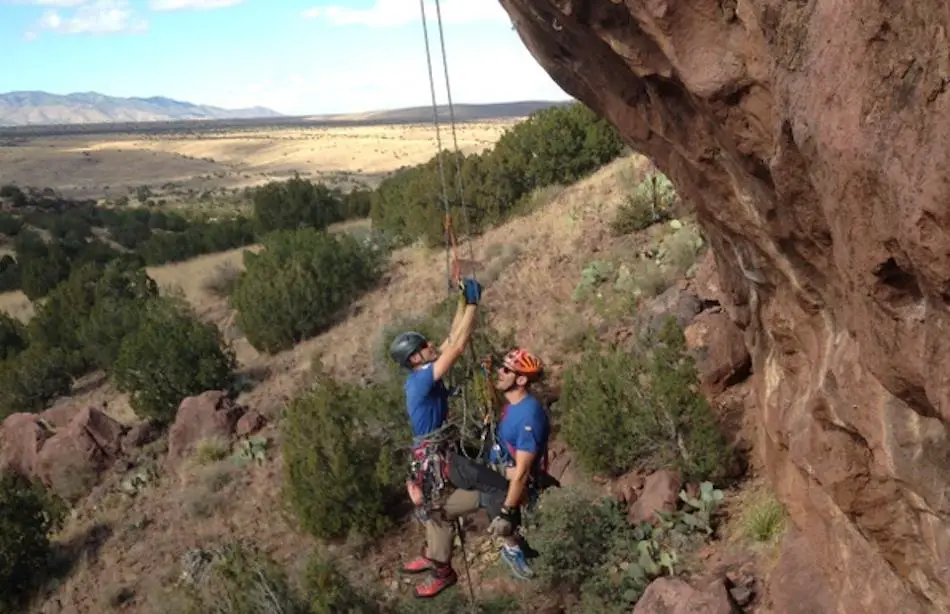
What is it: A standard rappel is one where you lower yourself down a vertical or near-vertical surface, with your back towards the ground and your feet up against the wall.
Why it’s good:
- Easy to learn
- Simple to execute
- Useful in a variety of situations
Limitations:
- Can’t do it with any kind of load
- Need a steady surface to brace against
- Slower than other techniques
Standard rappels are, as you might be able to guess from the name, the most common rappel that you’ll do. They’re also the first type of rappel that most people learn, and in many ways they’re the easiest. However, this doesn’t mean that you should take them lightly; standard rappels are also the area where the majority of climbing accidents happen.
A standard rappel is one where you lower yourself down a vertical or near-vertical surface, with your back towards the ground and your feet up against the wall. Your belay device will be connected around your pelvis by a harness, and you’ll use it to create friction on the way down.
This type of rappel is incredibly popular for simple situations where you just need to get down. For example, if you just finished up a sport route and want to lower yourself to the ground, the odds are you’ll be doing a standard rappel.
Another thing it’s good for is for beginners who are just learning to rappel. You’re able to easily control your speed of descent without having to worry about some of the more advanced techniques that we’re going to get into in some of the other types. If you’re just getting into rock climbing, or any other similar sport such as canyoneering or caving, I would highly recommend familiarizing yourself with a standard rappel.
While standard rappels are good for many situations, they do have their weaknesses. If you’re carrying any kind of pack with you, standard rappels can become tricky to execute. They can also be slower than other rappelling methods.
Strangely enough, the main danger in standard rappels comes from their simplicity. As I mentioned above, most climbing accidents actually happen when the climber is rappelling, and most climbers who rappel will be doing so via a standard rappel. So, why does this happen?
It’s because climbers become overconfident in their abilities and forget to follow all of the safety steps required from a standard rappel. This can happen in any number of ways, such as not creating a backup for their brake hand or forgetting to tie stopper knots at the end of the rope.
So, despite their simplicity, standard rappels should not be taken lightly. They are, however, and incredibly useful skill to have, and they should be learned and practice before you embark on any ropework-related adventure.
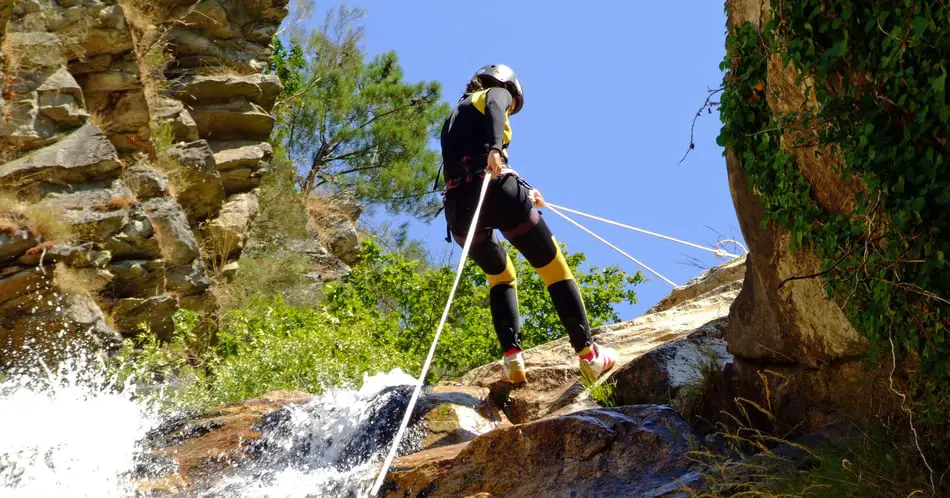
Australian Rappels
What they are: Australian rappels are rappels in which you descend face-first towards the ground, with your back to the anchor point.
Why They’re Good:
- Faster than a standard rappel
Limitations:
- More dangerous than a standard rappel
- No specialized equipment
- Dislike by the climbing community in general
If you like to have fun and enjoy doing things your own way (and don’t mind potentially debilitating back injuries), an Australian rappel might be for you.
As I mentioned above, an Australian rappel is one where you descend face-first towards the ground, with the rope anchored to your waist and your feet against the surface you’re rappelling on. This method allows you to gather much more speed than a standard rappel; if you so want you can actually run down the surface of the wall (but more on that later).
To perform this type of rappel, you have a couple of options. The first is to attach your belay device like standard and simply rotate your body one hundred and eighty degrees so you’re facing down the wall. This presents some challenges, because you’ll constantly be struggling against the rope trying to pull you back into a standard belaying position, and you risk loose clothing or items getting caught in a belay device.
Another method for an Australian rappel is wearing your harness backwards and attaching the belay device there. This is a more comfortable method of doing it, but it’s also where those debilitating back injuries that I mentioned before can happen. Climbing harnesses aren’t meant to be worn backwards; the load distribution is all wrong, and many of the safety features will be rendered moot. If you need to come to a sudden and/or jarring stop, you’ll be placing a lot of pressure on your lower back.
This brings up another issue about Australian rappelling, which is that there is very little equipment designed specifically to perform it. Most climbing harnesses and belay devices are created with standard rappels in mind. To perform an Australian rappel you’ll have to use standard equipment in a modified way, which always places you at increased risk of injuring yourself or damaging your gear.
These dangers mean that Australian rappelling is looked down upon by many members of the climbing community. In a hyper-safety-focussed sport, in which many people try to mitigate as much risk as possible, Australian rappels don’t have a whole lot of popularity. However, if you’re fairly confident in your skills and looking for a little excitement, watching the ground grow closer and closer while you sprint towards it can certainly be an exhilarating experience. They’re also handy if you’re in a rush and you need to descend quickly.
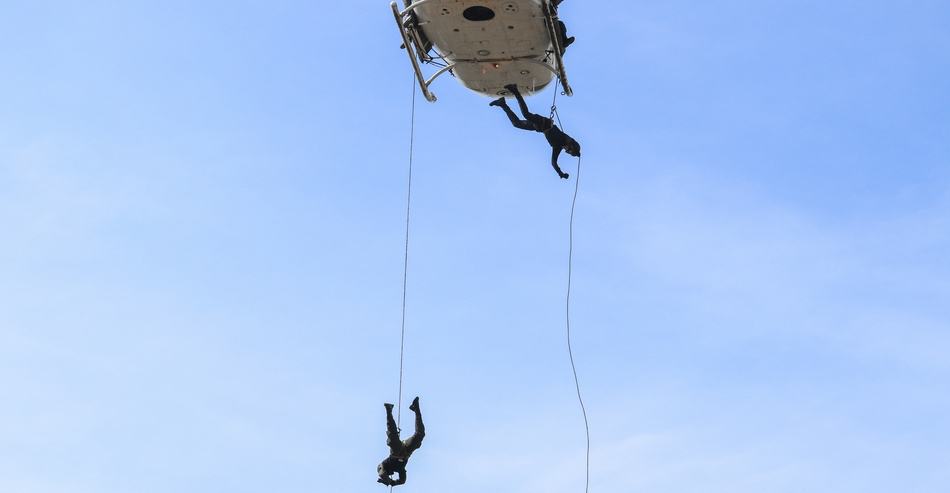
Hanging (Free) Rappels

What they are: Hanging rappels are similar in many ways to standard rappels, except you don’t have a wall to brace your feet against. Instead, you hang freely in open space, letting gravity do the work.
Why they’re good:
- Easy enough to perform
- Fun!
- Allow you to descend from just about anywhere
Limitations:
- More difficult to learn than a standard rappel
- Not reversible.
If you want to have fun while rappelling but don’t feel comfortable with an Australian rappel, hanging rappels (or free rappels) are a great choice for you.
In these rappels, you descend down a length of rope with your harness and belay device attached normally, using your brake hand for control. The only difference between this and a standard rappel is that here you have no wall to brace against; you’re dangling in open space while you descend.
The scenarios in which this might happen are numerous. The most common is simply if you’re faced with an overhanging cliff, where gravity will eventually pull you away from the wall and force you into a hanging rappel. However, many people also go out and seek hanging rappels, for no reason other than they’re enjoyable to perform. It’s a cool feeling, spinning slowly through the air while you head towards the ground, taking in the view around you.
Similar to a standard rappel, a hanging rappel is a skill that everyone should know how to do. As I said above, this is a scenario that you’ll almost certainly come across inadvertently if you’re climbing or canyoning. Being comfortable rappelling when your feet can’t touch the rock is a necessity for anyone who wants to head out into the mountains. The good news is, they’re not difficult to learn. Almost every step, from set-up to execution, is similar or identical to what you would do in a hanging rappel. You tie in the same way, attach your belay device to your harness the same way, and perform the same safety checks you would as a standard rappel.
There are two major differences that you should be aware of, however. The first is that, once your rappel turns into a hanging rap, you’re going to lose a fair bit of control over your body’s position. Chances are you’ll begin to spin slowly in one direction. This is perfectly normal and nothing to stress about, but it is something you should be aware of. The best advice I can give is not to fight it; struggling can actually make the spin worse, and you risk getting your rope tangles.
The second difference is that a hanging rappel is much more committing. Using a standard rappel, you can almost always find some way to stop the rappel, attach to the cliff that you were using for support, or jumar your way back up using your belay device (and a lot of effort). With a hanging rappel, however, once you’re out on the rope, there’s really nowhere to go but down. You can stop your momentum, of course, but once you do you’ll just be left dangling there until you decide to finish the rappel.
In most situations this is fine. The one thing to be aware of, though, is that the ends of your rope MUST be touching the ground before you commit to a hanging rappel. I cannot stress this point enough. If your rope is too short and you trying to perform a hanging rappel from if, there’s a good chance you’ll end up stuck there at the end of your rope, dangling in the air and hoping that someone comes along to rescue you.
Military Rappels
What they are: The Australian version of a hanging rappel. Originally designed to help Australian military lower to the ground while still firing, this advanced technique can bring a certain thrill to a normally passive activity.
Why they’re good:
- Speed
- They put you in a good position to return enemy fire, although I doubt many people who read this blog will ever have to engage in that.
Limitations:
- Dangerous
- Very little practical use
For all my thrill-seekers and freedom-fighters, this one’s for you.
Fast, dangerous, and completely exhilarating, military rappels allow you to dangle in open space while lowering yourself towards the ground as quickly as possible.
I want to make a quick distinction here. Many people will group military and Australian rappels into the same category as any rappel performed face-first. I’ve broken them up here much in the same way as I have a standard and a hanging rappel, although that certainly isn’t the only correct way of labelling either types of rappelling.
Another way you could distinguish between an Australian and a military rappel is that an Australian rappel is any rappel performed face-first, whereas a military rappel is any rappel where the person pushes themselves or runs down the surface with speed as the intent. For the purpose of this article, though, I’m going to stick to the following definition of a military rappel being a face first rappel, similar in many ways to the Australian technique, except performed without any surface to brace against.
This rappel compounds both the good and bad parts of an Australian rappel. If you’re looking for speed and fun, there’s nothing like it. However, it’s also easier to lose control and injure yourself, and you’ll need a lot of technique to pull it off.
Similar to a hanging rappel, this is something that you can either chose to do or be forced into doing. If you’re Australian rappelling down an overhanging cliff, you might have no choice but to turn it into a military rappel. If this is the case, you should definitely make sure you know the technique beforehand (or better— don’t Australian rappel down overhanging cliffs!). If you’re an experienced climber looking for a bit of a rush, this may be something you chose to do voluntarily.
(Of course, if you’re a service man or woman, this may be something you do for legitimate tactical reasons. If that’s the case, thank you for your service and I wish you nothing but safety. However, this blog is mainly climbing-focussed, so there may be other resources out there that you can check out.)
The dangers of a military rappel are pretty easy to summarize: they’re all the dangers of an Australian rappel, except on steroids. There’s more chance of something getting caught in your belay device and ruining the rappel. There’s a higher risk that you’ll have to come to a jarring halt and may injure your back or damage some equipment. There’s a greater chance of losing control and plummeting towards the earth.
On top of that, all of the dangers of a standard hanging rappel are also prevalent. In fact, it’s harder to maintain your body’s position when going face-first, so you’re even more at the mercy of gravity and momentum. You’ll still need to be watching that your rope is long enough, too, or you could end up in a pretty uncomfortable position.
As you can probably tell, I’m not the biggest fan of a military rappel. I don’t think they have very many practical uses in the climbing world, unless you need to descend something fast. If you’re halfway up a multipitch and get caught in a storm, I could maaaaaaybe justify using a military rappel to get the hell out of there— although I would still probably prefer to just perform a standard rappel and let out a bunch of rope at once to speed things up.
Still, though, that’s just my personal preference. Military rappels can be fun, and if you know what you’re doing and are confident in your ability to perform them safely, all the more power to you.
Simul-Rappel

What it is: A rappel in which you and your partner descend from the same length of rope— or two pieces tied together— except from opposite size, using one another’s weight to balance each other out.
What it’s good for:
- Situations where you need to get down quickly but don’t want to leave gear behind.
- Descending a narrow ridge or spire where there’s no anchor points.
Limitations:
- Advanced technique that’s difficult to perform.
- You need a climbing partner who’s roughly the same size, weight, and skill level as you.
Two climbers clip into the rope. Only one leaves alive.
I’m just kidding. In fact, the entire point of a simul-rappel is that both people get down alive and well, although I’m not joking when I say it is a dangerous technique where your actions can have serious consequences for both you and your partner.
Simul-rappelling is a precarious process where you and your climbing partner tie into opposite ends of the climbing rope and then drape the rope around some central point, such as the top of a narrow spire that you’re looking to descend.
The goal is to use whatever anchor you chose as as fulcrum point of the rope while you and your partner lower down either side. In this way, you can descend at the same time. It’s an advanced technique, but it can be useful for descending in a hurry and tends to be popular in certain climbing areas, such as the Needles in South Dakota.
I don’t have enough space to describe all the steps that go into a safe simul-rappel within this article, so if you’re going to try this, please learn from a certified guide and practice in a safe environment beforehand. Also, make sure you trust your partner before tying in to a simul-rappel with them. You don’t just need to know what you’re doing; your partner also needs to know their stuff, and you two should preferably have some experience simul-rappelling in a controlled environment before you decide to perform one under stressful conditions.
I cannot stress this last point enough. Just recently, rock climbing legend Brad Gobright died when his partner messed up on a simul-rappel. Trust whoever you’re doing it with, and make sure to do your partner checks.
Another key thing for simul-rappelling is communication, especially in terms of when you’re going to be weighting and unweighting the rope. This is essential to prevent someone from plummeting to the ground at an uncomfortably high speed.
Like I said, there’s a lot more to simul-rappelling than I have time to cover here, so do your research and stay safe out there.
Fireman’s Belay

What it is: A fireman’s belay is when you set up your belay as normal, except someone standing on the ground has access to the ends of your ropes and are therefor able to pull on them, impacting the speed of your rappel.
What it’s Good For:
- Teaching beginners to rappel
- Being extra safe in hazardous conditions
Limitations:
- You need a partner to perform it, and the partner must be able to descend first
- The person standing below is at increased risk of rockfall, etc.
A Fireman’s belay is a popular technique for getting someone less experienced down a rappel. In it, someone stands at the bottom of whatever you’re rappelling and takes control of the rappeler’s ropes. In this way, they have the same control as the person rappelling; if they pull down on the rope, it creates friction within the system and will bring the rappeler to a halt. Fireman’s belays can be conducted for standard, hanging, or Australian/military rappels.
This type of setup has a couple of areas where it can be really useful. The first is if your partner is somehow incapacitated and physically unable to get themselves down the rope. A fireman’s belay gives you the ability to take control out of their hands and lower them safely, without needing to worry about them falling or getting stuck halfway through the rappel.
The other place where Fireman belays are useful is if you’re spotting someone who is just learning how to rappel. You can use the Fireman’s technique to back them up on their way down; this allows them the opportunity to control their own lower, but you will retain the ability to stop their momentum if they begin moving too quickly. It’s an excellent way to help someone learn rappelling, or to teach a new technique without needing to worry about serious injury.
There are a couple of precautions that should be taken before you begin a fireman’s belay, though. The first thing to not is that the reaction period between you tightening the rope and your rappeler coming to a halt won’t always be instantaneous. If you’re working with a longer rope or a rope that isn’t perfectly static, there’s the possibility that it could take up to five seconds before the person performing the rappel comes to a full stop. This is something that needs to be taken into consideration if you think there’s a reasonable chance you will have to arrest a fall.
The second important safety item is that the person who is controlling the ropes from the bottom needs to be cognisant of falling rocks and debris from up above. A fireman’s belay can go very wrong, very quickly if the bottom person loses control of the rope; take extra safety precautions to make sure they’re not going to get whacked in the head.
Tandem Rappels
What they are: You and a partner clip into the same belay device to perform a rappel.
What they’re good for:
- Lowering an injured climber who may not be able to perform the rappel themselves
- Descending a rappel quickly.
- Carrying a load down a rappel
Limitations:
- More difficult to control the rappel
- Can place extra strain on equipment
A staple for performing rescues or moving heavy objects down lengths of rope, a tandem rappel is a skill that everyone should learn before heading out into the mountains. For this rappel, two people (or a person and an object, such as your haul bag) are clipped into the same belay device so they can be lowered down the rope simultaneously.
There are several uses for this type of rappel. It’s an alternative to the fireman’s rappel in that it allows you to navigate a rappel if your partner is injured and unable to perform it by themselves. It can take less time that a fireman’s belay, and it will give you greater control over the elements of descent.
Another area where a tandem rappel is useful is if you and a partner need to get down somewhere quickly. By strapping into the same belay device, you can cut your rappel time nearly in half— and that difference could quite literally be a lifesaver if the weather suddenly turns and you find yourself in a situation that you don’t want to be in.
Tandem rappels don’t need to be performed with another person, either. If you’re rappelling with a heavy object that you feel is too bulky or inconvenient to attach to your own harness, you can set it up tandem style and hang the object below you so that it doesn’t get in the way. This strategy can come in handy if you’re navigating a route with haul bags or a backpack that’s too large for you to comfortably rappel while wearing.
Like all the other methods, though, there are some difficulties and risks associated with a tandem rappel. Primary among them is then when you perform a tandem rappel, you’re doubling the amount of weight you put on the belay device (or at least increasing it by a significant factor). This means that the person controlling the rope is going to have to deal with much more weight in the system, which will make it difficult brake or to lower at a safe speed. This can mostly be mitigated by using a cam-locking belay device like a gri-gri, or even a more complex rappel-specific device like a SQWUREL.
Another hesitation that I would have towards tandem rappelling is that it places extra strain on your equipment. If you had to create an anchor, you now need to ensure that your gear, webbing, and slings are all prepared to hold twice as much weight as they would normally have to. This can make it more difficult to find a place to tandem rappel and can decrease the lifetime of your equipment.
Finally, tandem rappels make it harder to navigate. Side-to-side motion while on the rope is a lot harder to perform if you’re strapped in with another person. This isn’t so much of a safety concern, but it can make life really difficult if you’re rappelling a multi-pitch route and the next anchor point isn’t directly below you.
All in all, tandem rappels are a useful skill to have and can be a lifesaver if you ever need to perform a rescue, but I wouldn’t recommend doing them just for the fun of it.
Conclusion
So there you have it! That’s my list of the seven most common types of rappelling that I could think of. In summary, they are:
- Standard rappels
- Australian rappels
- Hanging rappels
- Military rappels
- Simul-rappel
- Fireman’s belay
- Tandem rappels
The different types of rappelling are useful in different situations, and they should only be used once you’ve practiced and learned them in a safe environment. Let me know if you have any questions, or leave a comment below if you think I’ve missed anything!
Related Questions
What’s the difference between a belay and a rappel?
Rappelling is when you lower yourself down the rope, whereas a belay is an action performed to catch someone else while they’re attached to the same rope as you. Belaying is often used for climbing or alpine journeys, whereas rappelling is more common for caving and canyoneering.
What is the best device for rappelling?
The best device for rappelling depends on what situation you’re heading in to (or, to put it a different way, what you’re going to need from your gear). If you want more information, you can check out my article here!