One of the strangest but coolest things you’ll see high-level ice climbers do is the ‘figure four’ or ‘figure nine’ move. I’ve written the following guide to help explain these techniques
So, what is a figure four? A figure four is an ice climbing move where you wrap one of your legs overtop of the opposite arm (e.g. your right left over your left arm). This gives you stability and body positioning.
And, what is a figure nine? A figure nine is an ice climbing move where you wrap one of your legs over the same-side arm (e.g. your left leg over your left arm).
Figure fours and figure nines are techniques used to keep your core tight and engaged when there are not good foothold options. By wrapping your leg around your arm like that, you are able to anchor your body in a certain position and push off of your leg to extend upwards. This allows you to make large reaches in a static fashion. Ice climbers us figure fours and nines primarily on overhung terrain, when there are no good foothold options.
In the following guide, I talk about each technique in more detail before covering when you might use them.
Figure Four and Figure Nine
What is a Figure Four?
As I said, a figure four is a technique where you wrap one of your legs overtop of your opposite arm while hanging from ice axes. This means that you either wrap your right leg over your left arm, or your left leg over your right arm. Check out the following video to demonstrate what I mean:
To achieve his position, you need to be hanging from good handholds on fairly over-hung terain. One there, pull your legs up in a tuck position to your chest and extend one of your legs (say, your right one). Once this leg is extended, twist your body sideways and loop the leg overtop of your left arm.
The leg should be resting so that the crook of your knee is hooked around your elbow, helping to hold it in place. From this position, you can now remove your right handhold and still be able to hang in a controlled position.
There are really three positions for a figure four: high, medium, and low. The low figure four position is one where your body hangs relaxed from the axe, your arm almost straight, with your head and torso level with your knee. Low is the most frequently used, but it’s also the most difficult to move from, because you have to pull your entire weight up using only an arm.
By contrast, high and medium figure four positions are harder to maintain, but give you more power when reaching or extending. In these positions, your anchoring arm stays more bent and you sit more forwards, using your core to keep you upright.
There are some pros and cons to figure fours. Some of the upsides are:
- It allows you to navigate overhung terrain: As I said, figure fours and perfect for incredibly steep terrain where there are few footholds. By wrapping your leg around your arm, it essentially creates a foothold out of nothing.
- It allows for static movement: Figure fours allow you to perform long reaches without needing to swing dynamically.
- It can hold you in place: If you’re putting in gear or simply want to find a good position to hang out for a few seconds, figure fours can be a good alternative to having to campus (climb with no footholds). It’ll keep you secure on the wall.
- It allows you to free up an arm: Similarly to above, if you have no footholds and need your hand for something (adjusting a position, pulling gear, finding your next hold), doing so in a figure four is a lot more comfortable than trying to hang from your axes.
- It pulls downwards on your axes: When ice or mixed climbing, you sometimes have very small placements that will cut loose very easily. In these positions, pulling downwards is often more secure then pulling laterally. If you use a foothold, you have a tendency to ‘push’ yourself in one direction, which can cause a fall. Figure fours allow you to downwards-load your axes, which can secure them in place.
However, there are also some downsides to this position:
- It’s tiring (like, really tiring): Hanging in a figure four position is, in a word, exhausting. It demands a lot from your arms, abs, shoulders, hip flexors, and glutes. That’s not to mention the fact that your entire bodyweight is resting on one hand, placing an incredible strain on your forearm.
- It can make falls awkward: Hanging from the ceiling with one leg wrapped around the other is a pretty awkward position to find yourself in if your ice axes lose their grip and you fall.
Really, the main downside of a figure four is how exhausting it is. Getting into that position, and then holding it for any sustained period of time, really adds to your fatigue. Because of this, you need to make sure you’re using it at the proper times.
What’s a Figure Nine?
A figure nine is a similar technique to figure four, except you wrap your leg around the same arm as you’re going to be resting your weight on. Check out the video below; the climber performs a figure four, and then switches it to a figure nine by swapping out his legs.
This picture also shows someone in a competition setting doing a nice figure nine:
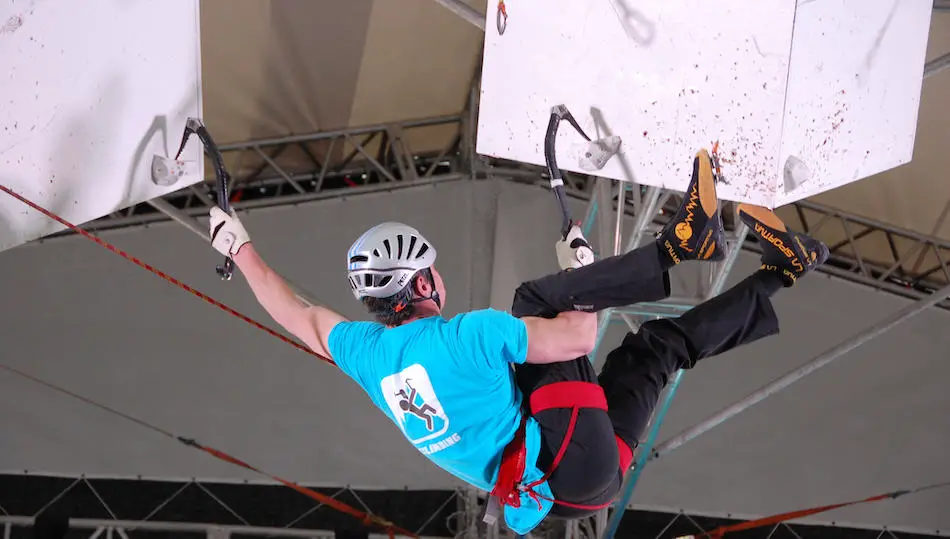
Figure nines have many of the same advantages/disadvantages of a figure four, with a couple of major differences. First, because of the way the leg goes, his position is less comfortable to hold for an extended period of time, meaning it’s not as good for resting or placing gear.
That doesn’t mean, however, that figure nines are useless. They’re handy for lateral reaches where you need to move sideways (like picture above), because of the inside positioning of the leg. Furthermore, if you’re ever in a position where only one of your hands is solid, it might be necessary to throw in a figure nine instead of a figure four.
When Do you Use a Figure Four/Nine?
Now that we understand the techniques, let’s talk a little bit about when you would use them.
Ice and Mixed Climbing
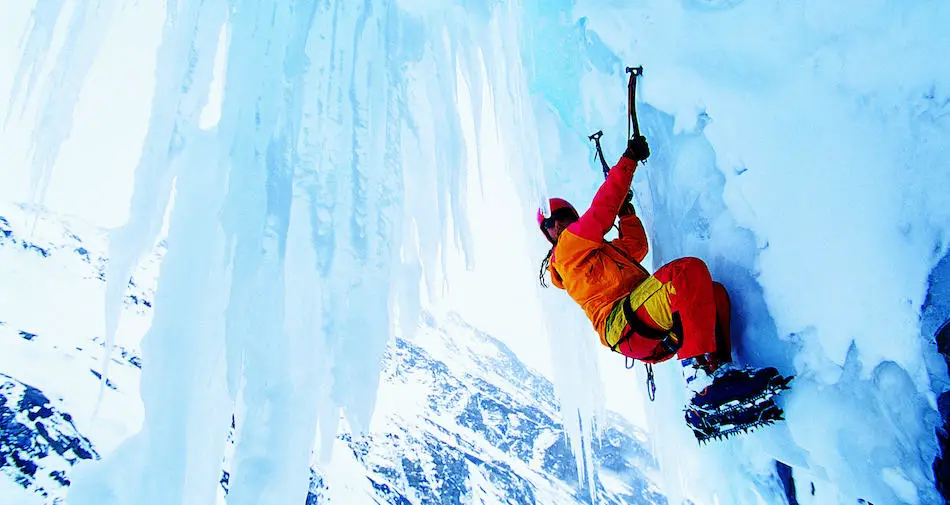
Obviously, the most common place to use these techniques is when you’re on difficult, overhung ice and/or mixed terrain.
Traditional ice climbing, with its steep vertical faces and long, runout pitches, has little place for figure fours. When you get into overhung terrain, however, these moves become invaluable for placing gear or completing hard moves with few footholds. They also allow you to perform long reaches without risking dislodging your tools.
Now, it should be said that figure fours aren’t for everyone. You need to be on the right type of terrain, with enough strength to pull one off and at least have a chance of not falling. You should make sure that your rock face is overhung enough that, if your tools give you and you fall, there’s no chance of swinging back into the rock. On vertical or slightly overhung terrain, I would not recommend using these techniques.
Training
Figure fours are also excellent training devices for a multitude of disciplines like ice climbing, dry tooling, and bouldering. The strain they put on your core, shoulders, and arms really whips you into shape for your next challenging project.
I would recommend training them somewhere where you have solid handholds (like a pair of rings) and something soft underneath you should your end up falling.
Rock Climbing
Finally, these techniques can be used while bouldering on certain moves. It’s not super common, but there are certain situations where these moves can help you maintain good body position. If you’re doing a long reach to a bad hold, figure fours/figure nines can help you do it statically.
Don’t believe me? Check out this video of someone figure nine-ing on a boulder in Squamish, BC: