Sometimes when rappelling, you may need to perform what’s known as a tagline rappel. I’ve created the following guide to walk you through what this is and how to perform it.
So, what is a tagline rappel? A tagline rappel is a rappel in which you tie a thin secondary rope to your primary rappel line. You then use this thin roper to pull the rappel line down once you’re done. Taglines allow you to lower yourself via a single-strand rappel while still being able to retrieve your rope.
A tagline rappel has some benefits and some downsides. The benefits, as I mentioned above, are that tagline rappels let you lower yourself on a single strand rappel without having to worry about losing your rope. However, tagline rappels are also a little more complicated to pull off, and they can make the rappel more dangerous if you perform them wrong. Additionally, it means you need to carry more gear with you.
In the following guide we talk about what a tagline is in more detail, when you should use one, and the steps you should follow to set one up.
What is a Tagline, and when should I use one?
First of all, let’s talk a little bit more about what exactly a tagline rappel is. As I said, it’s a specific set up where you use a thin secondary cord attached to your main rappelling line; this secondary cord allows you to pull down the rappel line once you’ve finished lowering from it.
Now, the important thing to note here is that you never weight the tagline. Taglines are usually thin pieces of cord (less than 4mm wide) and are not strong enough to be trusted with your bodyweight. Instead, you use the rappel line to perform a single-strand rappel ass you normally would. At no point should the tagline go anywhere near your rappel device.
To set this up, you use something called blocking. Blocking works as follows:
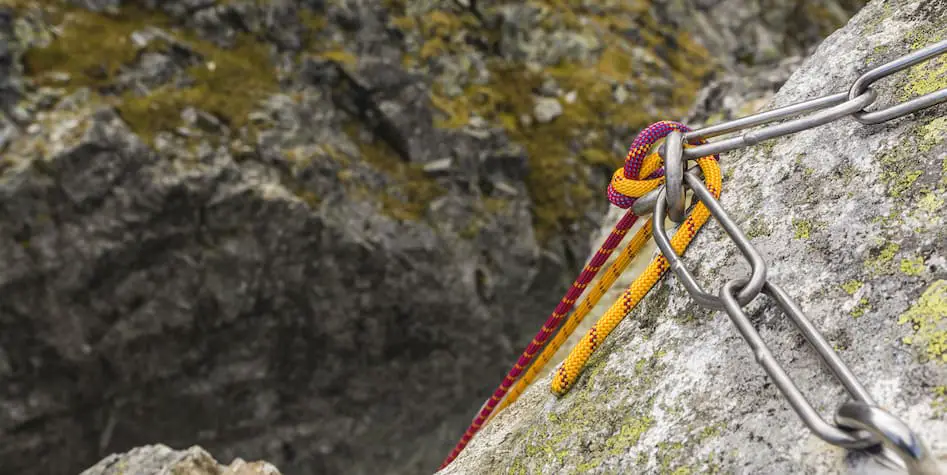
- First, you thread the rappel line through whatever anchor system you’re using.
- You then tie the rappel line and tag line into a knot. This knot needs to be wider than the rappel rings by a comfortable margin.
- When you pull on the rappel line, the knot should press against the anchor and prevent the rope from passing through.
- In this way, the knot blocks the rope from slipping through the anchor, keeping you connected to it so that you can safely rappel.
The above technique allows you to set up a single-strand rappel in a way that lets your retrieve your rope. Once you get to the bottom, you simply pull on the tag line, which pulls the rappel rope up through the anchors and back down to you, where it can then be retrieved.
To make all of this clearer, check out the following diagram:
As you can see from the above illustration, the blocking mechanism prevents the rope from slipping through, while the tagline allows it to be retrieved later.
Now, as I said, settling up a rappel this way comes with its own dangers. Blocking is dangerous; if the knot fails, your entire system is going to come apart and you’ll likely make an untimely exit from whatever cliff face you were rappelling down. You also run the risk of the knot becoming stuck in the anchor, which would strand you without a rope. Because of this, you need to be careful about when you use a tagline rappel.
Tagline rappels should only be used if a double strand rappel isn’t an option. This usually means that the next set of rappel anchors (or the ground) is too far away for you to reach with a double-strand set up, so you have no option but to go single-strand. Usually, this is going to occur on a multi-pitch climb, where you’re stacking rappels on top of each other. Other situations you would use a tagline include:
- Canyoneering, if the rope you have isn’t long enough to get down a certain section
- An emergency situation where you’re bailing off a mountain and need to get down a long strand of cliff
- On single-pitch sport climbs if you’ve somehow climbed something that is longer than your rope will allow you to be lowered from (this is a gumbie move, though. If you know how to tagline rappel, you’re experienced enough to avoid doing this).
How to Set Up a Tagline

With the basics of a tagline rappel covered, let’s talk more in detail about how to set it up. First, you’ll need the following equipment:
- A rappelling rope
- A device to lower yourself with
- An anchor
- A thin piece of rope to act as your tagline
- Spare carabiners, which can assist you with your blocking
Once you’ve got all the requisite gear, use the following steps to perform a tagline rappel:
- Clip your PAS to the rappel anchors.
- Ensure that your rope is secured to you in some way
- Thread one end of rope through the rappel anchors
- Take your tagline and attach it to the rappel rope (scroll down to learn more about the best knots to use for this process)
- If desired, us a carabiner to set up a more secure blocking mechanism
- Attach your rappel device to the rappel line
- Slowly weight the rappel line. You should be paying close attention to your blocking mechanism as you do. It should rest against the anchor without ever looking like it’s going to pass through. As you weight the line more, there should be no sign of movement in the knot.
- Clip a carabiner to your harness and then clip the tagline through it. This will keep the line close to you as you rappel.
- Do all of your regular safety steps (backups, stopper knots, etc).
- Once you’re ready, perform your rappel as normal
- Secure yourself to the next set of anchors
- Secure the tagline to your harness via a knot or carabiner
- Untie the stopper knot
- Pull the tagline downwards. This should draw the rappel line up, where it will pass through the anchor before falling back down.
There we go! That’s a step-by-step guide on how to perform a tagline rappel.
Best Knots for a Tagline

The main concern for a tagline rappel is that you’re tying two ropes that are different diameters. This can make it harder to create a knot that won’t ‘roll’ on itself and come undone. Because of that, you should only use specific knots that are designed to prevent this.
Flat Overhand / Patagonia Knot
The flat overhand knot has gotten a lot of flak over the years and has even been nicknamed the European Death Knot. Don’t let the name scare you, though; this is a tried-and-true knot that, as long as you tie properly, will perform perfectly well for all of your tagline rappelling needs.
To tie a Flat Overhand Knot, you simply hold the two ropes together, create a loop, and then pull the short side through the loop so that it forms an overhand knot. Pull to tighten (check out this video for a tutorial).
When tying this knot, there are some things to be aware of. First, you want to make sure that you leave at least 30cm (1 foot) of tail behind the knot. Second, you may want to tie a second overhand knot directly behind the first; this will prevent the chance of any rope slippage.
There’s an old climbing saying that tells it takes 10 minutes to tie an overhand knot: 30 seconds to tie it, and 9.5 minutes to convince your partner that it’s safe to rappel from. Like I said, this knot got a bad rap in the past, mostly from people tying it wrong and thus causing accidents. As this article says, though, the flat overhand knot is a perfectly good option to use when you’re tagline rappelling.
Gibbs Knot
The Gibbs knot is the knot that American manufacturer Sterling Ropes recommends for tagline rappelling. Very similar to the flat overhand knot, it features an extra pass-through that serves to make both the knot bulkier (so there’s less chance it will pass through the anchors) and stronger.
This knot will flip over to its flat side when pulled against an edge. This can make it sit better against the rock and prevents the odds that it will get snagged.
Figure 8 Follow Through
The figure 8 follow through takes longer to tie, but it has several advantages for rock climbers looking to perform a tagline rappel.
First of all, it’s a familiar knot to tie, as it’s the exact same one you use to tie into your rope when climbing. This makes it easier to trust and harder to mess up, even if you have to tie it in intermittent conditions. Secondly, it’s incredible secure, which is a really good thing considering you’re going to be trusting this knot with your life.
The figure 8 follow through has a proven history of working with ropes of different diameters, so you don’t need to worry about using it for tagline rappelling. The only major consideration would be to check that your figure-8 knot is large enough that it can’t pass through the rappel rings. If you’re worried about the knot coming undone, it can also help to tie a secondary figure 8, which should (in theory) give you twice the protection.
There we go! That’s all the info I have on tagline rappelling. As I said earlier, this is an advanced technique, and you should seek expert advice / practice in a controlled environment before you break this out on an expedition. The information on the blog is for educational and informative purposes only, and is not intended to be used as instructional material.