Front pointing is an essential skill to learn for anyone who wants to start ice climbing. I’ve created the following guide to teach everything you need to know.
So, what is front pointing? Front pointing, also known as the German technique, is an ice climbing technique where you drive the toes of your crampons into the ice to gain purchase. This creates a strong foothold, although it does place all of your body weight on you calves.
Front pointing involves keeping your feet straight and kicking into the ice with the foremost two points on your crampons. One they stick into the ice, you then stand up on your toes so that only those two points are attached, with the rest of the foot hanging in open air. Front pointing is the only way to gain traction on many pieces of steep ice (ice that is past 70 degrees in slope). Even on shallow ice, front pointing can be useful.
What Is Front Pointing?
As mentioned above, front-pointing is a technique where you kick into the ice with your toes until the tips of your toes gain purchase. Only two of the points on your crampons will be touching the ice, and the majority will be suspended in mid-air.
Front-pointing is one of the most common and simple techniques to learn in ice climbing. For most beginners, it will be the most natural way to gain purchase on the ice.
This technique allows you to create a secure foothold in the ice, as you can actually create a little ledge to stand on. By kicking into the ice, you drive your crampons several centimeters into the surface, where they can dig in and gain traction. This is a stark contrast to other methods such as the French technique, where you’re relying mostly on your crampons’ friction against the ice.
To front point, you need a pair of ice climbing crampons that have single or mono points on the front. They also need to be aggressive, thin-bladed, vertical front points that you can drive in. Many general mountaineering crampons will have flat, horizontal front points. While these devices might work for snow or glacier travel, they lack the rigidity needed to kick a firm foothold into a sheet of ice.
Technique
The general idea behind front pointing is fairly simple. To front point, use the following steps:
- Angle your foot so that the sole of your boot is perpendicular to the ice
- Draw your leg back at the knee, keeping your quad in the same place
- Kick your foot forwards in a smooth motion until you make contact with the ice
- Do this 3-4 times until you feel that the foot has a firm purchase
That’s it! As I said, this is a fairly intuitive technique that most beginners will be able to grasp fairly quickly.
Like most things in ice climbing, however, there’s a difference between doing it and doing it well. Foot placement, kicking force, and knowing when to commit are some key things that you need to be aware of before you declare yourself a front pointing expert.
Foot placement
This element can be broken down into two main things that you need to consider: frequency and location.
Frequency
When climbing on vertical ice, I try to follow a simple rule: you should move your feet three times for every one time you move your axe.
There’s another, slightly more crude adage you can memorize for your front pointing technique: kick how you poo, and swing how you screw.
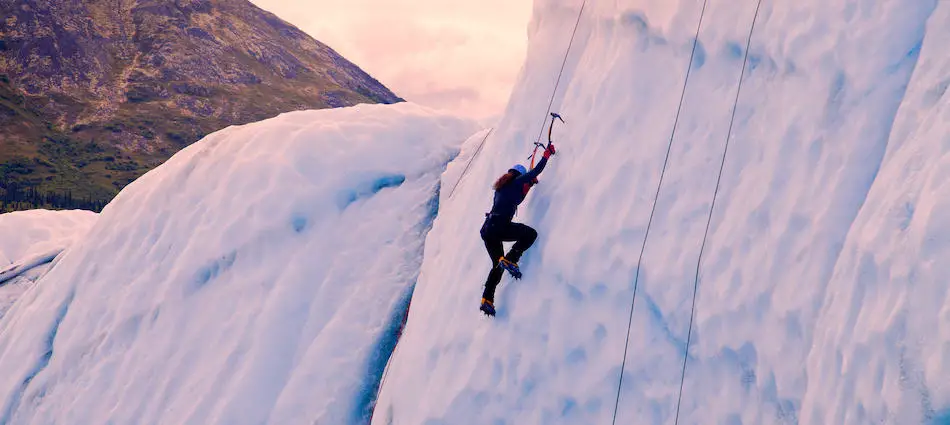
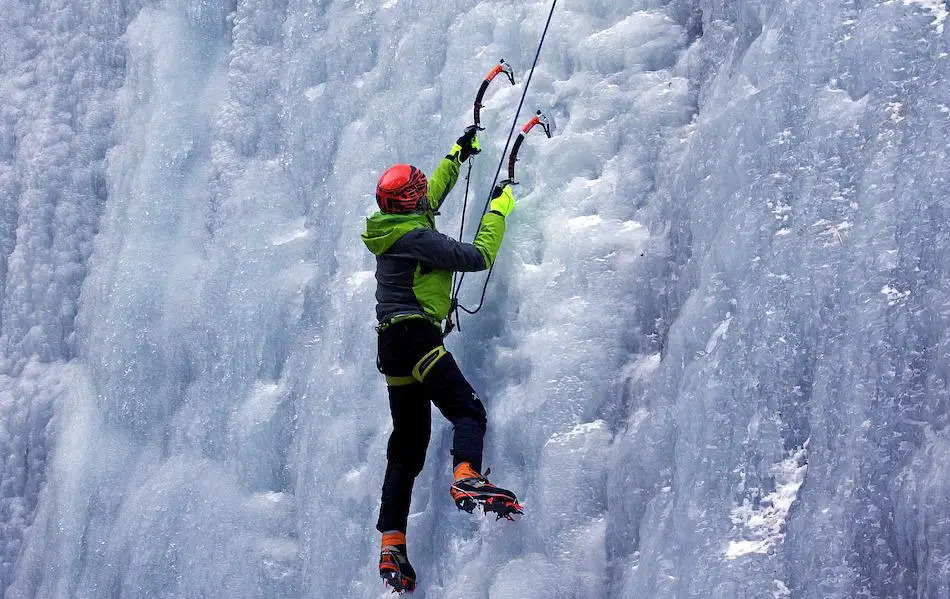
So, what does that mean? When front pointing, you want to stand up straight on your feet (the same position you would be if you were lying down flat, hence the ‘screw’ moniker) so that your entire body is vertical before you swing your axes. Swing the axe high above your head until you find a good placement in the ice.
This is when the three-to-one rule comes in. Now that you’ve moved one of your axes, you should try to make three foot placements before moving your next axe. Remember, you’re trying to ‘kick how you poo’. This means that, when you’re placing your feet, you should do so with the intent of moving your body into a squatting position, as shown here:
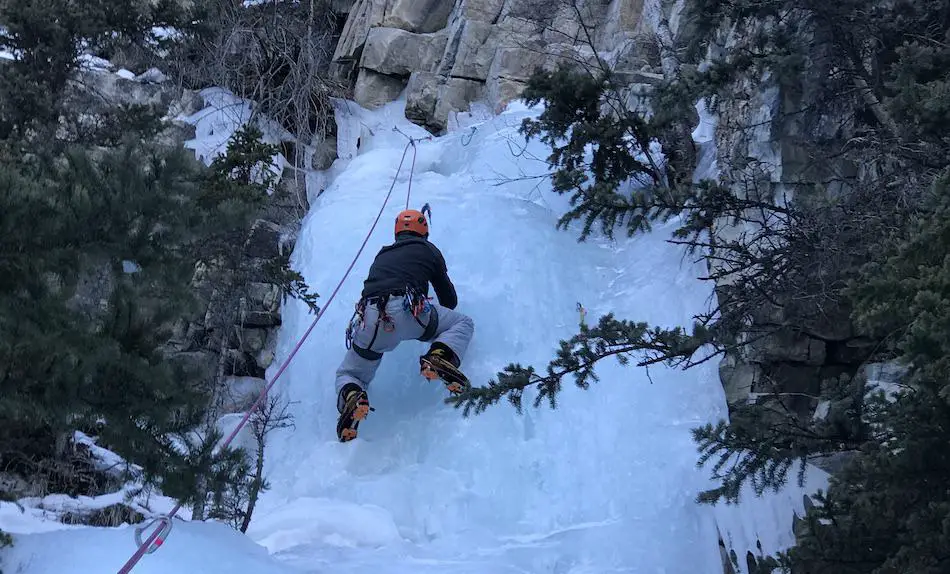
Note how one of my axes is outstretched above my head, while the other is down by my chest.
A good way of making sure you get all three foot placements is to use the following method:
- Swing your axe so that it’s firmly in the ice
- Weight the axe, hanging your body down from it
- Bring one foot up into a half squat position and front-point kick until it’s firm
- Bring your second foot up into a full squatting position and kick until it’s firm
- Bring your first foot up to match the second foot
Your body should now be in a full squat, with one axe above your head and one axe somewhere lower. Now, you repeat the process: your stand up into your straight (‘screwing’) position and swing your lower axe as high as you can. Weight the axe and start the tri-step kicking technique all over again.
Using three different foot placements has a couple of advantages to it. First, it forces you to actually pay attention to where you’re placing your feet. On ice, similarly to rock climbing, it’s easy for beginner or pumped-out climbers to panic, rush, and forget their footwork. By drilling the three-step process into yourself, you ensure that you’re always deliberate about your foot placements.
Second, it allows you to move up in a more gradual manner. Sudden large moves on ice can weight your axes in weird ways, which can cause them to lose their purchase and lead to a fall. The more slowly you move up the wall, the less chance there is of this happening.
Location
Where you put your feet is just as important as how you put them there. No matter how good your technique is, ice you place your crampon on a bad patch of ice, you risk it cutting loose.
One important thing to keep in mind is that you want to keep your feet wide when you place them. They should be about 50% past shoulder width— wide enough to create a secure base, without impeding your natural movement. Doing so prevents you from swinging side to side when you move your axes and can be a good way to ensure you don’t fall.
Past that, you need to be paying attention to the actual physical quality of the ice that you’re kicking into. Shallow ice can cause you to hit the rock beneath, which will both compromise the quality of your placement (as there isn’t enough ice for the crampon to get a firm grip on) and risk damaging your equipment. Similarly, you want to look out for damaged, air-filled, or otherwise insecure ice that risks breaking when you weight it.
You should always try to kick directly into the ice, so that your foot is perpendicular and at a ninety-degree angle to the wall. This will allow your crampons to create the maximum amount of traction.
Pros of Front Pointing
Now that we know what front pointing is and how to do it, it’s time to talk
about some of the reasons it’s good:
- It’s the only option for steep ice: When it comes to any ice above 70 degrees, front pointing is essentially the only way for your foot to create any kind of traction with your feet. Because of that, it’s a must-have for anybody who wants to do any serious waterfall or steep alpine ice climbing
- It allows you to create the most secure footholds: By driving the points of your crampon deep into the ice, you’re attaching yourself firmly to the ice. Other methods like the French technique don’t give you the same type of security, even on more shallow slopes.
- It’s a more natural movement: On ice slopes in the 50-60 degree range, front pointing is going to be the most natural way of stepping for most people. While you can use other methods to walk flat-footed on the ice, these are going to be harder to learn for most people, and they won’t feel as secure. Furthermore, front pointing is easier on your ankles and hips.
- It allows for quick movement in semi-steep terrain: On any ice slope greater than 50 degrees, front pointing is going to allow you to cover more ground quickly. This is because of the security of the footholds; you can drive your tips into the ice and weight them quickly, moving onto the next step before you even have to think about it. Trying to walk flat-footed will feel a lot less secure, and this lack of security can cause you to slow down.
Essentially, front-pointing is a natural movement that allows you create secure footholds on semi-steep to steep ice. If you want to vertical ice climb, front pointing is essentially the only option you have for doing so.
Cons of Front Pointing
Even front pointing is a time-tested technique that has a lot of advantages, there are also some downsides to it:
- It huts your toes after a while: This may sound dumb, but it’s actually an important consideration to take into account. The act of kicking at rock-solid sheets of ice hundreds of times throughout the day can bruise your toes, especially if your boots are incorrectly fitted. Aside from being uncomfortable, this can actually have negative impacts on your safety: if your toes are aching, you’re less likely to want to kick solidly into the rock, which could compromise the security of your foot placements and lead to a fall.
- Front pointing tires your calves: Standing on your tippy toes for ten minutes as a time (about how long it can take to work your way up a 60-meter climbing route) can absolutely destroy your calve muscles. Sometimes, you have no option other than to suck it up. If you’re front pointing on flatter ice, however, you risk tiring your calves out for when the going gets steep and you really need them.
- It’s not effective on flat terrain: Front pointing becomes nearly redundant as soon as the slope of the ice dips beneath 40 degrees. Trying to front point on flat ice will use up a lot of time and energy that you don’t need to expend. Because of that, it’s good to know other methods like the French Technique.
Front pointing is physically demanding and can take a lot out of you. Furthermore, it’s not applicable in every scenario, so it can’t be the only ice climbing technique you know.
When You Should Front Point
Now, that point begs the question: when should you front point? There are three main scenarios you should be aware of.
On Steep Ice
As I said, front pointing on steep ice is often your option. For steep slopes, alpine ice, or anything graded harder than WI-2, you’re going to need to know how to front point.
Certain people who are very good at walking flat-footed can manage to do it on slopes of almost 70 degrees. Past this point, however, even the most seasoned French mountaineers are going to have to concede to the inevitable and start kicking into the ice.
For most people, this point occurs much earlier than the 70-degree mark. As soon as the ice begins to get in that 45-50 degree range, it can make sense to switch to a front-pointing technique.
When You Need Security
On moderately steep ice, some people may choose to forgo front pointing so that they can travel more quickly or allow their calves to rest up. This can be good for general travel.
However, if you’re in a scenario where your fall risk is increased, you’re worried about your purchase, or the going gets more technical, kicking directly into the ice can allow you to gain a much more solid foothold.
Some scenarios where this may be a good idea include:
- When you’re placing an ice screw
- If you need to pause to shake out
- If you come across irregular formations, like bulges or cauliflowers
- If you find yourself getting gripped
Any time you feel yourself wanting a little more security, front pointing can be a good way to get it.
On Firm Ice
Finally, front pointing can be a good alternative to walking flat footed on extremely firm ice, even if it’s not that steep.
The issue with walking flat-footed is that you’re counting on the bottom eight points of your crampons to be driven into the ice by your bodyweight to such a degree that they stick in and give you purchase. Particularly on soft ice or snow slopes, this can be a very effective method.
If you’re in the middle of a cold snap and the ice is rock-hard, however, this may not work as well. The harder the ice is, the more force you need to drive into it and created a good person. If flat-footed walking isn’t working, consider switching to the German technique to gain a little more traction.
Alternate Techniques
Finally, let’s discuss some alternate techniques to front pointing. There are two main ones that are used by ice climbers all over the world:
French Technique
As I’ve mentioned a couple of times, the French technique is the other popular method that comes up in ice climbing. Otherwise known as ‘walking normally’, the French technique involves putting your boot down flat-footed on the ice so that your entire sole— and all eight crampon points— are against the surface of the ice.
The French technique is almost the complete opposite to front pointing. It’s good on shallow ice and places less strain on your calves, but only work’s up to a certain degree and doesn’t allow you to gain as firm of a purchase, especially on steeper ice. For more information, check out my full guide to the French Technique.
American Technique
For those who love a compromise, the American technique combines the better traction of front-pointing with the decreased strain of French steps. When on a moderately steep slope (think 60-70 degrees), the climber stands with the forward foot in a German stance and their back foot in a French one. You then front-point up with one leg and follow with the other turned outwards in a French technique stance.
This allows you to front point on steep ice, while keeping your back leg steady and rested. When you get tired, you can swap legs and let the back one take over for a little bit, allowing your calves to rest while still enjoying the benefits or front-pointing.
Conclusion
So, there we go! That’s my complete guide to front pointing. Thanks for reading!