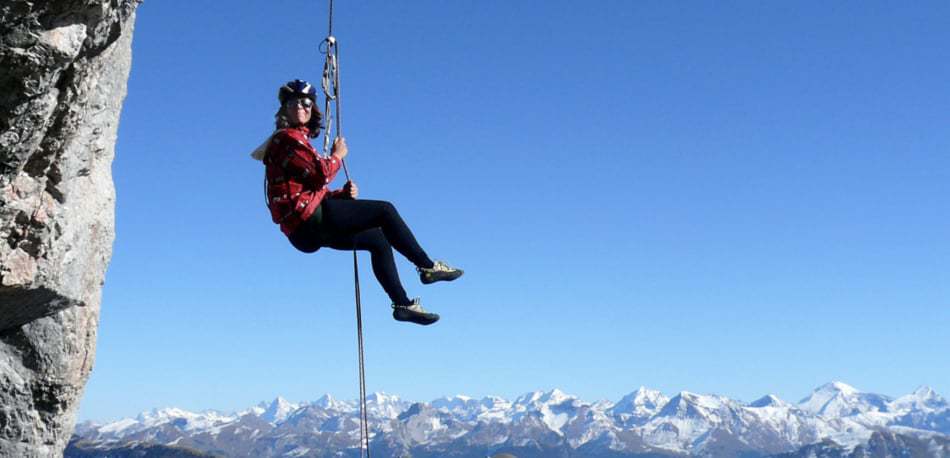
A prussik knot is one of the easiest and most important knots that you can tie while rappelling. I created the following guide to teach everything you have to know to use one.
So, what is a prussik? A prussik is a friction knot that tightens when placed under stress. When rappelling, this allows it to act as a backup to your main rappel. The prussik knot should be tied around your rope and then attached to your harness in some way. By doing this, you ensure that, should you ever make a mistake while rappelling, the knot will catch you and prevent you from falling to the ground.
A prussik is one of several backup knots that can be used while rappelling to ensure you get to the ground safer. Because of how easy it is to tie and how effectively it works, it’s been popularized within the climbing community and, for many people, if the only backup knot that they use. I personally use the prussik all the time (most recently while ice climbing in the Canadian Rockies), and I can vouch for its effectiveness. In the following guide, I’m going to talk more about why the prussik is and how it works, before getting into the specific details of when to use it and some alternative knots.
What is a Prussik?

As I said above, the prussik knot is a friction knot. This means that, when placed under tension, it will tighten and create friction; when not under tension, it does not create this friction. More specifically to climbing, the knot will tighten around your rappel rope to such a degree that it becomes impossible for the rope to pass through the knot. In this way, the knot acts as a backup by ensuring that when the knot stops the rope from moving through it, you also stop, arresting any momentum that may have built up.
The beauty about a prussik knot is that it only tightens when placed under pressure; in all other scenarios, it will allow the rope to pass through it without creating friction. This means that you can rig the knot in such a way that it will only tighten if you’ve lost control of the rappel.
For rappelling, this allows the knot to act as a backup without interfering with your normal progress. In the next section, I talk about how exactly you tie the prussik so that it can perform in this capacity.
How to Tie a Prussik
As I mentioned above, one of the main benefits of the prussik is how simple it is to tie. It takes less than thirty seconds to put it in place, meaning there’s no reason to skip this step.
To tie a prussik, you’ll need the following equipment:
- 4 feet of paracord or cordelette, tied in a circle
- A carabiner
That’s it! Aside from being easy to tie, the prussik also requires very little equipment. Important things to note are that your carabiner should be weighted for at least 24Kn of static tension (in other words, it should be a standard climbing carabiner), while the cordelette needs to be fashioned into a circle with a knot that won’t come undone when placed under pressure. To complete this step, I would personally recommend a figure-8 passthrough or double bowline knot to make sure that it stays in place.
Once you have the cordelette tied in place, use the following steps to tie your prussik:
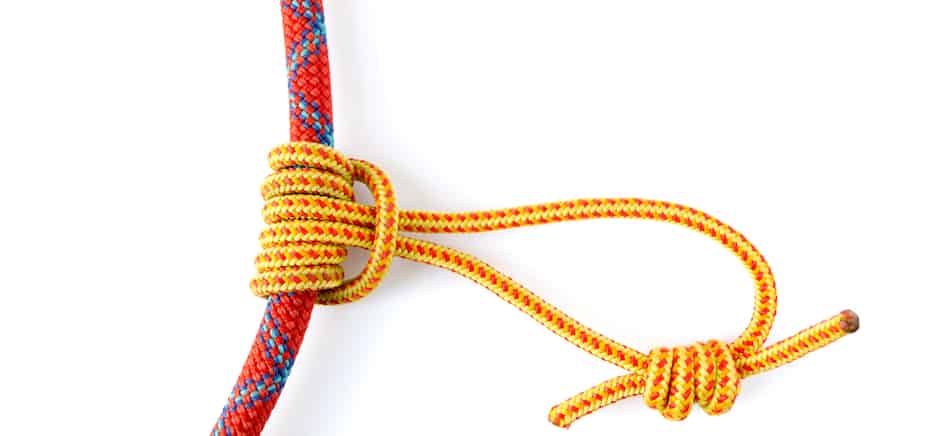
- Take the cordelette and hold it perpendicular to the rappel line, with the rappel line in the middle of the cordelette loop.
- Slide the loop to one side so that the rappel line is no longer centered. You should have 25% of the cordelette on one side and 75% on the other (roughly)
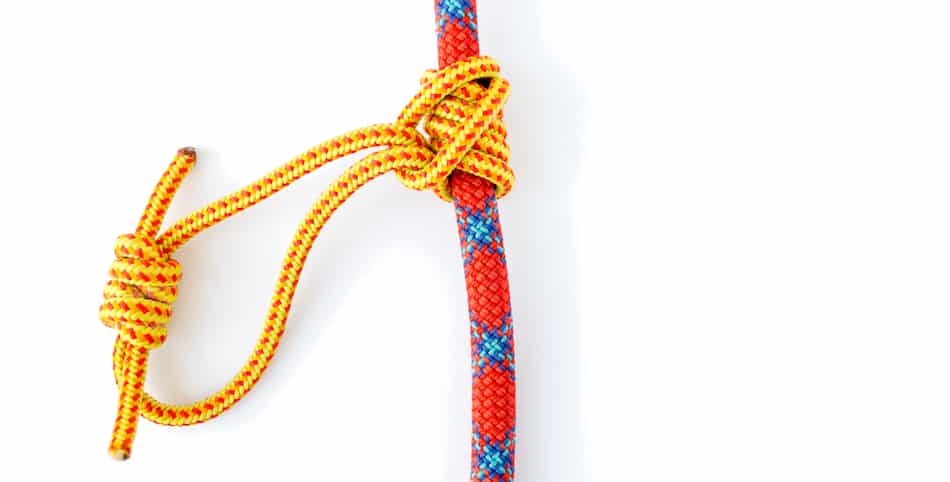
- Take the short end of the cordelette and pull it across the rappel line, as if you were tying a girth hitch. Instead of tying the hitch, however, wrap the cordelette all the way around the rappel line
- Repeat this step 3-4 times
- Finally, thread the long end of the cordelette through the short end in a girth hitch fashion.
- Using the carabiner, secure the long end of the rope to your harness loop. Do not clip the knot to your leg loop. This is a fraudulent move that’s illegal in several countries (it’s not actually, but it does make the rappel less safe).
Congratulations! You’ve now tied a prussik knot.
The cordelette should be the right length so that it hangs loose when you’re rappelling, but will tighten if you let go. In this way, the prussik will stay loose until it’s needed (once you’ve lost control of the rappel).
When to Tie a Prussik Knot
Now that we know how to tie a prussik, let’s get into more details about when you should tie one of them.
Now, I’m a stout believer that you should always, always back up your rappels. It takes very little time to do it and it could end up saving your life if you ever make a mistake when rappelling.
That being said, I know not everyone is going to follow my advice. Rappelling is one of those activities that sometimes gets ignored or forgotten about, despite the fact that loads of climbing accidents actually happen while rappelling. Still, people tend to be confident in their rappelling abilities, and they don’t see why a backup is necessary in every scenario.
So, if you’re one of those people, you might not end up tying the prussik knot in every scenario. If I can’t change your mind to do so, I can at least highlight some situations where you would especially want a backup:
- On single-strand or thin rappels: With less rope in the system, you’ll have a harder time creating friction and slowing your descent. A backup can be extra important in this scenario.
- Cold hands/pumped forearms: In either of these situations, you lose some of your ability to effectively grip and control the rope.
- Your rappel will require pendulums or frequent stops: If you’re going to be swinging around on the rope to get to the next rap station, or stopping frequently to remove gear, a backup can be a good idea.
- When there’s significant rock/icefall danger: If you get knocked out on a rappel, your backup knot will literally be a lifesaver. In areas where you’re worried around stuff coming down from above, a prussik should be mandatory.
Where Should You Tie the Knot?

Ooooh, boy. I’m going to lose some fans because of this.
When tying a prussik, you have two options: you can place it above the rappel device, or you can place it below on the same strand of rope that your brake hand is on. Which one is proper has caused quite a bit of discourse within the climbing community.
Personally, I believe that the prussik knot should be tied beneath the rappel device. Now, before you go deleting my blog and clearing your search history, let me explain why:
- Placing it below the rappel device requires it to hold less weight. If you place your knot above the device, you’ve going to be asking it to hold your entire bodyweight once you let go of the rope. If you place it below the device, the knot only has to grip as tightly as your hand was. This is significantly less pressure, leading to less chance that the knot will fail.
- Placing it below the belay device allows for it to be undone more easily. This one is similar to the reason above. If you tie it above, it’s going to come under a lot of weight. This will make it difficult for the knot to be loosened afterwards, meaning you could become stuck on the rappel.
For those two reasons, I recommend that you always tie your knot below the belay device.
Pros and Cons
Before using the prussik, you should beware of what it’s good at and what some of its shortfalls are. I’ve created a quick list below.
Pros of a prussik:
- Easy to tie: As I said, the knot is simple to learn and simple to execute, meaning that you have to spend less time tying it. This also means that there are fewer places you can mess up.
- Two-directional: The knot can act as both a backup and an ascender when used properly. This allows it to be used in a variety of scenarios.
- Strong catch: Once tightened, the prussik creates a very firm seal and there’s little chance that it will allow rope to slide through it. You can (and may have to) trust this knot with your life.
Cons of the prussik:
- Can be harder to undo: Because of how good it is at catching, the prussik can be harder to undo once it’s weighted. This can be mitigated by tying the knot below the belay device.
- Slightly finicky to ‘stack’: The first few times you tie it, the multiple loops you perform can lead to strands of rope getting tangled up or crossing over each other.
- Sometimes difficult to rappel with: The prussik is known to tighten involuntarily and not allow for the smoothest rappels.
Alternatives
The prussik knot isn’t the only backup out there. If you decide that the pros are outweighed by the cons, or even if you just want to have a few options at your disposal, here are some alternatives to this knot:
The Klemheist: The klemheist is a similar knot to the prussik that’s easier to work with but, in exchange, does not provide the same degree of safety. To tie a klemheist, you wrap the rope around the rappel line in a stacked fashion instead of a collapsing one. This is easier to tie than the prussik, but it also makes the knot uni-directional; if you accidentally tie it upside-down, it won’t have nearly as much stopping power.

Auto-Blocks: The auto-block is almost identical to a klemheist, except you don’t girth hitch it at the end. This knot is the easiest to tie and to undo, but it also provides the least stopping ability of any backup knot.
The Bachman Knot: Bachman Knots have been mostly forgotten by the climbing community, although they are still popular amongst rescue operations. The Bachman is an auto-block with a carabiner added in between the knot and the rappel line. This reduces stopping power but makes the rope much easier to loosen, making it ideal for stop-and-start rappels.
Conclusion
So, there we go! That’s everything I have on the Prussik Knot. Remember, climbing is a dangerous sport, and rappelling can be one of the most dangerous parts. This guide is a good starting point, but you should always make sure to practice these techniques in a safe environment and seek the help of a more experienced climber before you try to use it while out in the mountains.
Stay safe and have fun!
