
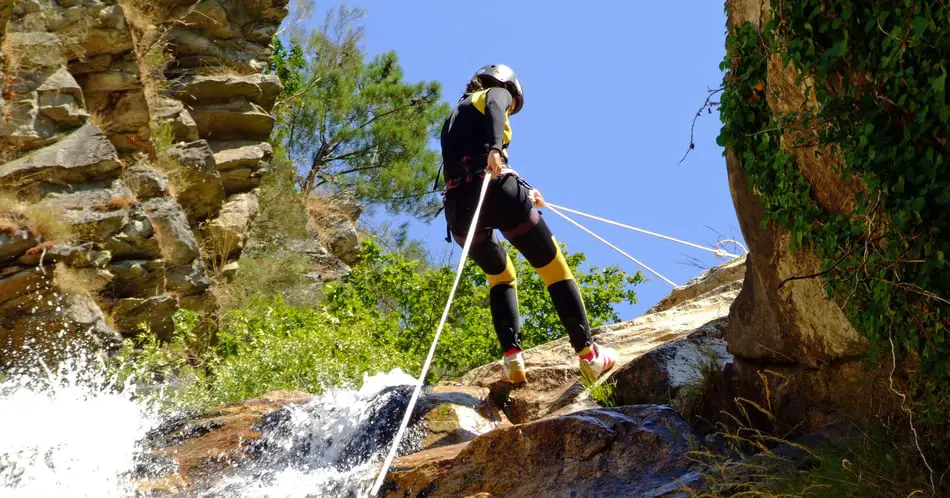
Backing up a rappel is one of the most important steps you can take to ensure your safety. After talking with my friend about the different methods he used, I decided to do some research and write a comprehensive guide on the different methods you can use.
So how do you back up a rappel? Backing up a rappel involves using some system that will stop the rope from passing through your belay device if you become unable to do so. This protects you in case you somehow lose control of the rappel.
In the simplest terms, a backup for your rappel is anything that will stop the rope when you become unable to. It’s a system, knot, or piece of gear that will take the place of your brake hand if your brake hand stops working. The backup, if set up properly, will catch your fall before it even starts, preventing you from zipping down the rappel at freefall speed.
There are several different ways to back up a rappel, and lots of discourse as to what the best method is. In the guide below, I talk about why backups are important, before breaking down each of the methods and their pros/cons.
Why do you need to backup a rappel?
The simple answer to why you should back up your rope: shit happens.
Really, that’s the best answer. When you’re in the mountains, stuff sometimes goes wrong. It doesn’t matter how experienced you are, how many times you’ve done a rappel, or how good your technique is. There are going to be factors out of your control, and everyone makes mistakes sometimes. A backup allows you to make these mistakes and live to learn from them.
The point behind backing up a rappel is fairly simple. If you become compromised in some way and lose control of the rope, the backup is there to stop you from falling to the ends of your rappel. It’s a safety measure so that your entire life isn’t being supported by your brake hand alone.
A backup catches you when you can’t catch yourself, whether it’s from injury, exhaustion, or carelessness. It can prevent you from seriously hurting yourself based on a stupid mistake or a stroke of bad luck.
When should you back up your rappel?
So, now that we know what a backup is and why we should do one, there’s one very obvious question that people ask: when should you back up a rappel?
I tend to err on the side of caution when climbing, so my response to this is simple: always. You should always, always backup a rappel. I don’t care if you’re rappelling a 20-foot route at the local crag. I don’t care if you’re in a hurry. I don’t care if you’re the most recent reincarnation of Warren harding and you’re here to usher in the fourth golden age of climbing. Always, always back up your rappel.
The reason I’m so stringent about this rule is because there’s literally no reason not to. Tying a prussik knot takes all of five seconds, and it can quite literally save your life. As far as I’m concerned, backing up a rappel should be standard practice, like locking your carabiner or tying a stopper knot.
That being said, I know there are people out there who disagree with me. If you don’t think you need to tie a backup on every rappel, I can’t force you too. What I can do, though, is point out some situations where you absolutely should tie a backup:
- When you’re super pumped: The more tired you are, the less ability you have to grip the rope with your brake hand. Finally sending the repoint 5.12b you were working on is sick; making sure you don’t die on the descent because your forearms are blasted is even sicker.
- Your hands are cold: Similar to above, this reduces your ability to tightly grip with your brake hand.
- There’s significant rockfall danger: Any time you’re seriously worried about getting smacked by a rock on the way down, tying a backup knot is key. Even if the impact of rockfall doesn’t knock you out, it can injure or distract you for long enough to lose control of your rope.
- Single strand or thin rope rappels: The skinnier the rope is, the faster it’ll pass through your belay device, and the harder it is to grip.
- You need to pendulum to get to the next rappel station: This one’s for my multi-pitch climbers. Swinging around on the edge of a rope is significantly easier if you can use both hands to operate, so a backup is essential.
- When the rope is wet: Once again, the rope will be harder to grip.
Now, keep in mind, the above is not an exhaustive list. In any situation where you feel that the rappel is going to be more challenging than normal, or there’s an increased risk of you losing control, I would highly recommend a backup.
Okay! We now know what it means to back up a rappel, why it’s important to, and some scenarios in which it’s (extra) important to tie a backup. With all of that covered, let’s get into the best ways to actually do it!
How to Back Up a Rappel
There are numerous different ways you can back-up a rappel, all of them serving the same function: to stop the rope from passing through the belay device. Broken down, there are three main methods that people use:
- Friction knots
- Manual backups
- Gear-based backups
Friction knots
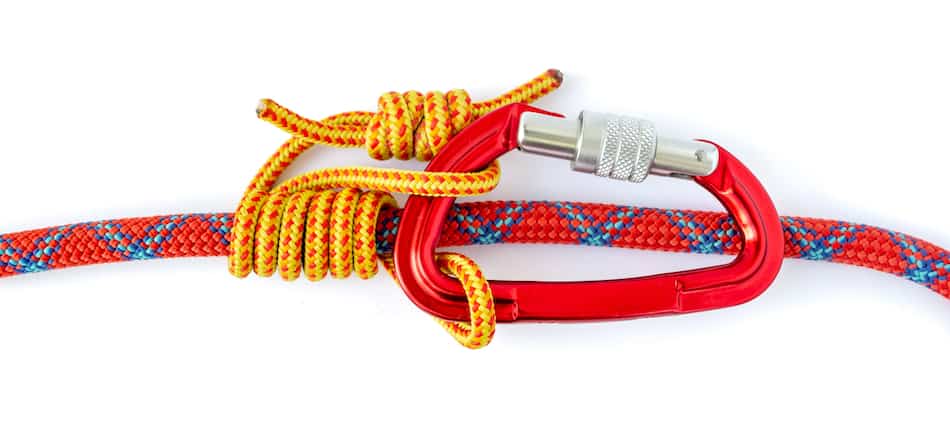
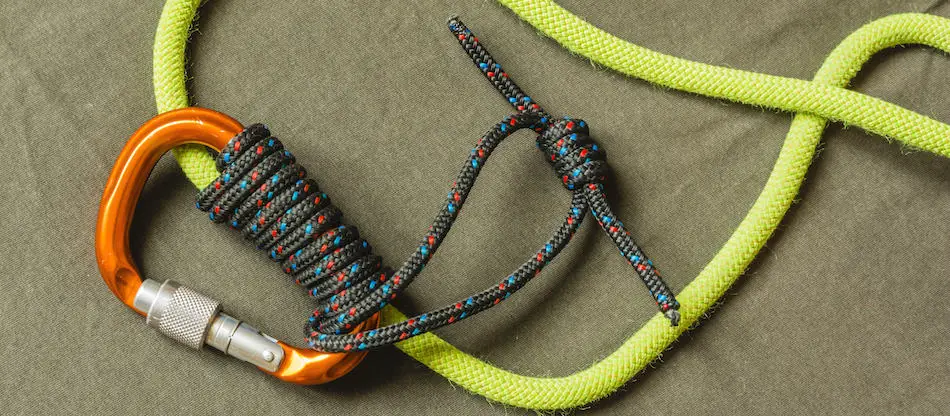
Friction knots are far and away the most common way to back up a rappel. They’re quick, easy, and super effective. All you need is a minimal amount of knot-tying experience and three feet of cordlette, which almost every climber will have on them. They’re also super reliable. The simplicity and effectiveness of these methods makes them the most common ways to back up a rappel.
Friction knots are tied around the rope and connected to your harness via a carabiner. The idea is that if your brake hand releases and you begin to fall, the knot will be pulled tighter around your rappel rope and you’ll stop in place.
Every climber at the crag is going to have a different opinion about what the best method for tying a backup knot is. The truth is, a lot of it comes down to personal preference, so experiment with different methods and learn what’s best for you. The most common types (and the one’s we’re going to go over in this guide) are:
- Prussik Knots
- Klemheist
- Autblocks
- Bachman Knots
I’m going to explain all four in greater detail. Before doing that, though, there are a couple key questions to go over:
Where do you clip the backup knot?
As I said above, a friction knot is tied around your rappel line and then connected to your harness in some way. The question remains: where should you connect it to your harness?
There’s a recent trend I’ve seen of people clipping their rope to their leg loop. This, in short, is a complete and utter travesty.
First of all, having the leg loop be weighted if you stop halfway down your rappel is super uncomfortable. Secondly (and more importantly), your leg loop isn’t designed to function like this. It’s not rated to take vertical pressure, and it often has buckles that could be loosened or opened if the carabiner caught them the wrong way.
Instead, you should clip your backup knot to one of the gear loops on your harness. That’s what they’re designed for. This setup will be more comfortable and a tad bit safer.
Should you tie the knot above or below my rappel device?
Oooooh, boy.
I’m probably going to have some unhappy people no matter how I answer this question. If you want to stop reading my blog because of my opinion on this, I completely understand.
I know there’s a lot of discourse about this one, and I understand that there are valid points on either side, but my opinion is firm: your backup knot should go below your belay device. There are two main reasons for this:
- Safety: If you tie the backup knot above your belay device, it needs to hold your entire weight in order to arrest your fall. If you tie it below, however, it only needs to grip the rope as tightly as your brake hand does. This puts significantly less pressure on the device.
- Ease of operation: If you weight a rope that’s tied above your belay device, it can become extremely difficult to undo once it’s cinched up. No one wants to be stuck hanging on the edge of their rope because their knot became too tight.
Now, with that being said, I do have to acknowledge that tying the knot above your rope is easier if you’re going to have to unclip your rappel device to, say, pass a knot in the rope. This is an extremely uncommon maneuver, however, and should be reserved for only the most experienced of climbers.
So, with the discourse out of the way and those points covered, it’s time to move on to the most important part: breaking down the different knots.
The Prussik Knot
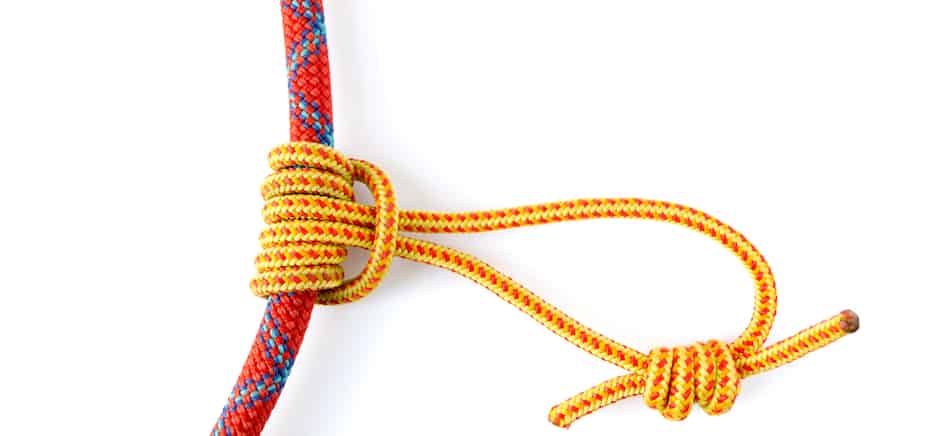
What it is: A knot that stacks several girth hitches on top of each other. It cinches around your rappel rope when weighted.
Pros:
- Easy to tie
- Great at catching you
- Two-directional; it can work as an ascender as well as a backup
Cons:
- Can be difficult to loosen once weighted
First and foremost (and my personal favourite) is the prussik knot. The prussik is simple, easy to use, and super effective at gripping the rope. It’s a fan favourite amongst climbers, and people are unlikely to judge you if you tell them that you use a prussik knot to back up your rappel.
A prussik is also a two-direction knot; it can also be used to ascend the rope in an emergency. Back in the good old days, before jumars had been invented, legends like Royal Robbins used this method when they needed to get up a fixed line.
If there’s one disadvantage to a prussik, it would probably be that it tightens pretty ferociously around the rope. This means that, once you stop, it can be difficult to get the prussik loose enough to allow you to begin rappelling again. Personally, though, I barely see this as a disadvantage. The point of a backup is to stop you if you need to be stopped; getting going again once you’re back in control is definitely a secondary concern.
To tie a prussik knot:
- Take a piece of cord 3-5 feet long and tie it in a loop, connecting the ends with a fisherman’s knot.
- Hold this rope so that it’s perpendicular to your rappel line.
- Bring one side of the rope around your rappel line, so that the cord is folded over the rap rope. It should be the same setup you would perform if you were about to tie a girt hitch.
- Instead of passing the longer end of the rope through the short one to complete your girth hitch, loop the short end of the rope through the long one several times. The more times you do this, the tighter your knot will cinch.
- Finally, pass the long end of the rope through the short one and pull tight. Clip the long end of the rope to your harness, and you’re good to start rappelling!
Klemheist
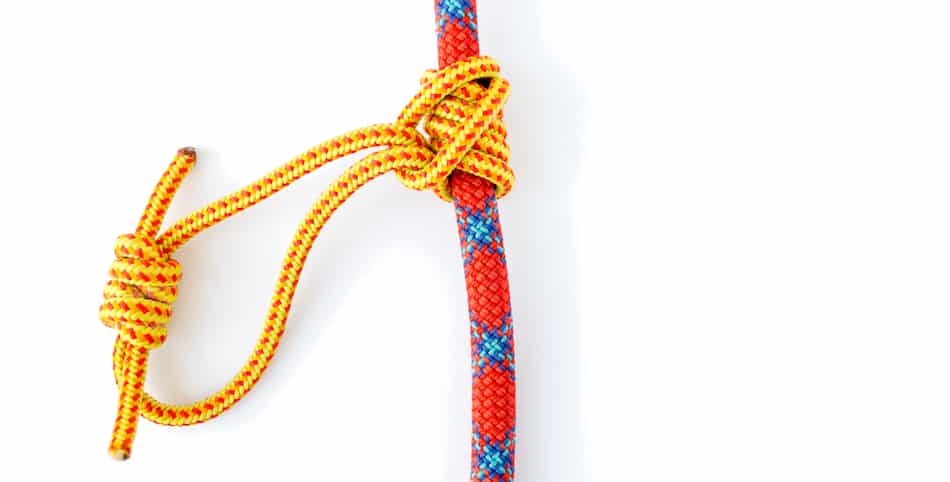
What it is: A very similar knot to the prussik, except the cord is twisted in a stacked fashion, not a collapsing one.
Pros:
- Easy to tie
- Slides up and down the rope smoothly
- Easy to unweight
Cons:
- Doesn’t have the same catching ability as the prussik
- Unidirectional
If the prussik knot is your dad’s old pickup— reliable, steady, but a little hard to work with— the klemheist is like a brand-new Cadillace Escalade. It looks pretty similar on the surface, it’s going to be a much smoother ride, but when you get down to the nitty gritty it might not perform quite as well.
That’s not meant to be a diss on the klemheist. It’s a good, solid knot in many ways. It’s quick to tie, even for a beginner. It allows you to ascend and descend the rope quickly and easily. Most importantly, it doesn’t jam up as often as the prussik knot, meaning you’re less likely to have to struggle with it if you want to start rappelling again.
However, this last strength is also the klemheist’s weakness. It doesn’t tighten to the same degree as the prussik does. If your rope is thin or wet, you’re carrying a lot of weight, or you’ve somehow managed to pick up a good turn of speed, the klemheist won’t have the same catching ability as the prussik knot.
There is another potentially major disadvantage to the klemheist: it’s uni-directional. It will only tighten if you wrap it towards the load, so the tail needs to be at the bottom or this not will not be nearly as effective.
That being said, it can be a good alternative if you’re performing a very simple rappel and just want a backup for peace of mind. In intense situations I wouldn’t recommend it, but for rappelling at the crag where there’s low risk of anything happening, it’s a little less high maintenance than the prussik can be.
To tie a klemheist:
- Start with a four-foot length of rope. Tie it into a loop using a double fisherman’s knot.
- Take one end of the rope and wrap it around your rappel line.
- Continue to wrap the rope around your rappel line, moving vertically up the rappel rope so each wrap stacks on top of the previous one
- Do this 3-4 times
- Girth hitch the ends of the rope and clip it to your harness.
Autoblocks
What it is: A very similar knot to the klemheist, except you do not girth-hitch it.
Pros:
- Easiest to set up
- Fastest rappel speed
- Slides under load, so it’s easier to unweight
Cons:
- Least gripping power
For experience rappelers who just want the peace of mind provided by a backup, the autoblock may be the way to go. It’s quick, easy to set up, and has far less chance of messing up the flow of your rappel. If you’re in a hurry to get down, the autoblock is probably the knot for you; it’s far less likely to tighten involuntarily, and if you do use it to stop, it’s a lot easier to start up again.
Of course, the advantages of an autoblock come with matching disadvantages: it has the least stopping power of the above three knots, so that makes it marginally less safe. If you’re rappelling with a thinner rope or riding the pig, I would not recommend this type of rappel. Under normal circumstances, thought, the autoblock is a very strong candidate to be your go-to friction knot.
To tie an autoblock:
- Take a loop of cord about 2 feet in length
- Coil it around the rappel rope in much the same fashion as you did with the klemheist
- 3-4 coils is standard, or until you feel the cords ‘bite’ into your rappel line
- Instead of girth hitching the rope, attach both ends through a carabiner and clip this ‘biner to your harness loop
Bachman Knots
What is it: the forgotten stepchild of friction knots, the Bachmann is a klemheist knot but with a carabiner added in.
Pros:
- The best knot for start-and-stop rappels
- Ideal for rescue situations
Cons:
- Requires additional gear
- Slightly harder to dress
- The carabiner reduces gripping power
The Bachmann knot, for reasons I can’t figure out, never really found its place amongst the friction knots that are used to back up a rappel. It should have a niche right next to the autoblock: it still has the gripping power to prevent most rappelling accidents, but the addition of the carabiner makes it far easier to unweight once you’ve loaded it up.
Because of this feature, the Bachmann is great if you need a modified ascender. I would definitely keep this in your toolkit, although it is a tad bit harder to tie than the klemheist or the autoblock. I would guess this is the reason for its lack of popularity.
How to tie a Bachmann:
- Press the carabiner against your rappel line so that the gate is facing outwards
- Clip the cord through your carabiner
- Wrap the cord around the rope much as you would a klemheist; however, each time you pass around the rope, pull the cord through the gate of the ‘biner so that it wraps around both the rappel line and the carabiner
- Do this 3-4 times
- Girth-hitch the remaining rope and attach it to your harness
So, there’s the codex on four of climbing’s most popular friction knots. As always, practice them in a safe environment before you try them out on the wall!
Method two: Manual Backups
Friction knots are by far the most common method of backing up a rappel because of how easy they are to use and how reliable they are. The problem with a friction knot, however, is that you need to trust the person rappelling to be in control of their own descent. In some situations, this might not be the best idea. If the person rappelling is a beginner, or if they’re incapacitated in some way, you might want to add a little extra security to the descent.
In this situation, it’s best to use what’s known as a manual backup. A manual backup is one where someone else other than the person rappelling has control over the rope. This allows you to control your partner’s descent; if they make some error that leads to them losing control, you’ll be able to stop them from hitting the ground.
There’s two main methods of performing this type of backup:
Fireman’s Belay

What it is: A hybrid lower in which someone ‘spots’ the rappeller by holding the rope at the base of the rappel. By pulling down on the tails of the rope, they can create friction in the system and halt the person from descending any further.
Pros:
- Easy to execute
- Good for showing a beginner how to rappel
Cons:
- Not ideal in every situation
- Can put the spotter in danger
A fireman’s belay is the staple for backing up another person on a rappel. It’s best if you’re trying to walk a beginner through the motions; you can allow them to retain control and go through the normal motions of a rappel, while you have the ability to halt their descent if they do anything wrong. It’s easy to set up and easy to execute, so there’s little room for error.
If you want to learn more about a Fireman’s belay you can read about it more in depth here, but the basic method is as follows:
- The person sets up the rappel as they normally would
- Their climbing partner stands at the bottom of the rappel and holds both pieces of rope in their hand
- The person rappelling can now lower without any backup knots or other safety device in place. If they lose control, the person holding onto the rope at the bottom can pull the ropes tight. This will have the same affect as a normal brake hand pulling the rope down, and the person who is rappelling will come to a stop.
Like I said, this is a great option for teaching someone how to rappel. It allows you to spot someone while on rappel, while still giving them ability to retain autonomy over their own actions. You can teach them how to rappel while still manually backing them up should they mess up. If you’re with a beginner, this method might be superior to tying a backup knot, as you can stop and start the rappel much more easily.
However, there are some drawbacks to this method, and it should never be your primary method of backing up a rappel. For starters, it can never work for every member of your group: someone will always have to descend the rappel first without the safety of a backup, so they should know an alternate way of backing themselves up. Secondly, this can put the person who is doing the backing up at risk of rockfall, as they need to stand directly underneath the person who is lowering themselves.
In summary, fireman’s belays are great for spotting up a beginner as they lower themselves, but I wouldn’t rely on them as your primary method of backing up your rappel.
Manual Lower
This one isn’t really a method of backing up a rappel, but I still want to include it on the list because of how it relates to a fireman’s rappel. If you’re climbing with someone who, for whatever reason, you don’t trust to rappel themselves, lowering themselves via a top-rope rappel can be a good alternative to the fireman’s belay. It’s a little harder to set up, but it allows you to retain more control over the other person, and it can be a lot safer for the person doing the lowering.
It can also be an alternative for spotting someone who’s just learning to rappel. If you don’t want to do a fireman’s (and you have a spare rope), do a dual method; let the person lower themselves on rappel, but tie them in via a top rope system so you can arrest their fall if anything happens.
Gear-Based Backups
The third way of backing up a rappel is to use a piece of gear with an auto-locking feature. Again, this is far less common, but it’s still worth touching on so I can speak to some of the advantages and disadvantages of using this type of system.
When I say a gear-based backup, I’m talking about pieces of equipment such as a Petzl Gri-Gri or Stop Descender that has a cam built into it. If you lose control over the device, it automatically closes in place around the rope and locks in place.
The most obvious benefit of this system is that it takes a fair amount of the responsibility out of your hands. You no longer need to worry about remembering how to tie your knot, stacking your rope correctly, or ensuring the direction of the setup. Now all you need to do is trust that the gear manufacturer did their job correctly and clip into the rope.
However, this increased security also comes with at the cost of a lack of versatility. When you rely on your gear, you then become dependent on that gear; if you find yourself in a situation where the gear doesn’t work, you can get into some deep water.
A good example of this, again, is the Gri-Gri. It can be excellent for single-strand rappels where you need to lower yourself down. However, if you find yourself needing to perform a two-strand rappel, your device is going to be kind of useless.
So, on the topic of gear-based backups, I would say this: use it as a compliment to your safety procedures, not as the entire procedure. Use a gri-gri if you want, but make sure you also know how to tie a backup knot.
Conclusion
So, there we go! This is a pretty long article, but there was a lot of stuff to cover here. We’ve gone over the different ways to back up a rappel, the specific techniques to perform these methods, and some of the pros and cons of doing it a certain way.
Remember, climbing is a dangerous sport, and rappelling can be one of the most dangerous parts. This guide is a good starting point, but you should always make sure to practice these techniques in a safe environment and seek the help of a more experienced climber before you try to use it while out in the mountains.
Stay safe and have fun!