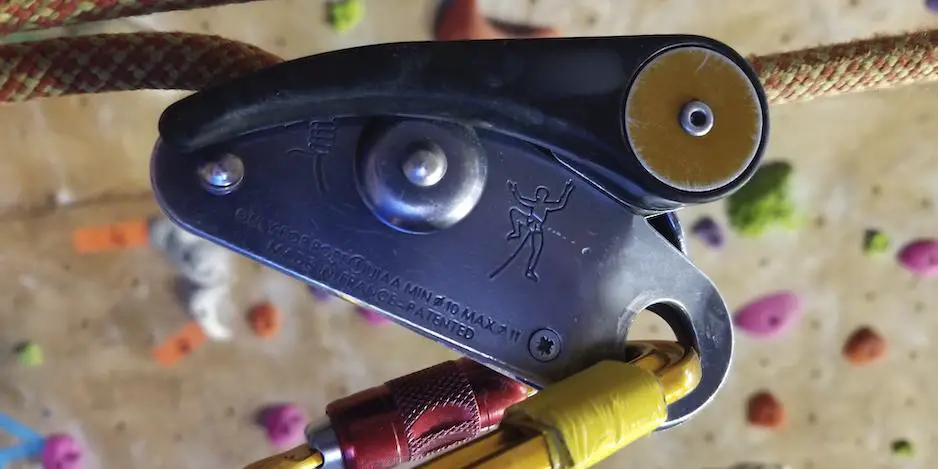
Since 1991, the Petzl gri-gri has been one of the most popular belay devices on the market. It’s possible that someday, you may find yourself needing to rappel with one.
Performing this type of rappel can be a little bit tricky. Before rappelling with a gri-gri, learn these seven tips:
- Know the pros and cons
- Use a rope between 8.5-11mm
- Learn how to tagline rappel
- Use a backup knot
- Learn the differences in friction control
- Use a carabiner or second device to smooth the rappel
- Learn to tie a stopper knot mid-rappel
Following these tips will help you stay safe and comfortable while performing your rappel. Because gri-gris are designed for belaying and not abseiling, they’re a little bit trickier to perform your rappels with. While this doesn’t mean that you can’t do it, you certainly have to know what you’re doing to safely rappel with a gri-gri. The following tips will allow you to do that so you can make an informed decision about whether or not you want to use your gri-gri to perform your rappels.
Know the Pros and Cons
There are advantages and disadvantages to rappelling with a gri-gri. Before trying it, you should be aware of both of them. I’ve created a quick list below.
Pros of rappelling with a gri-gri:
- It has an assisted braking feature: Because of the camming device inside the gri-gri, it will automatically stop you if you do something wrong. This is a huge advantage for those who are just learning to rappel, or people who may be a little bit more scared.
- It can function as an ascender: The same blocking feature mentioned above also gives the gri-gri a massive advantage over traditional friction devices: it can help you get back up the rope if you ever need to (say, because you rappelled past your anchors).
- Varying levels of friction: The latch on the gri-gri allows you to adjust how much friction you put in the system, which can be handy when performing more technical rappels.
Cons of rappelling with a gri-gri:
- It doesn’t work with double-strand rappels: Because of the way the system is designed, gri-gris can only accept single-strand setups. This means that the gri-gri might not be the best device in some scenarios.
- It only works with certain diameter ropes: Similar to above, the design of the gri-gri limits is adaptability. If your rope is too thick to fit inside, you won’t be able to rappel with it.
- It can be harder to control your speed: The lever I mentioned in the pros section, while giving you greater control, can be finicky and difficult to control, especially if you’re using a dynamic rope. This makes it harder to find a consistent speed to rappel at.
Use a Rope Between 8.5-11mm

The gri-gri works by creating a metal tube that the rope slides through when belaying or rappelling. On one end of this tube is a camming device that closes unless the lever is engaged. This device prevents the rope from passing through unless the lever has been pulled, which gives the gri-gri it’s assisted braking features.
The issue with such as a setup is that, as mentioned above, there are very specific rope widths that will fit into this tube-and-camming system. If your rope is too narrow, it will pass too easily through the camming system; your gri-gri won’t be able to create any friction, and you’ll lose most of your ability to rappel.
On the other hand, if the rope is too wide, it won’t fit at all. This is actually a worse outcome. With a too-narrow rope, you can likely rig some kind of carabiner-and-prussik setup that allows you to perform a safe rappel. With a too-wide rope, however, you won’t be able to use the device in the first place, and you might find yourself stuck halfway up a cliff.
Therefore, it’s important to bring the correct diameter of rope along with you. Ropes between 8.5-11mm are the only widths that are officially recommended by Petzl, who manufactures the gri-gri.
Fortunately, this isn’t a super restrictive design flaw, as most rappelling ropes are going to fit within this range. In fact, four out of the six best rappelling ropes currently on the market will work for this size, so you’re not going to have to look too hard to find a rope that works with the gri-gri. Before heading out, though, it can be a good idea to double-check that the gri-gri fits.
Learn How to Tagline Rappel

A tagline rappel is a specific technique that allows you to rappel from a single strand of rope and then retrieve your rappel line once you’re done. If you’re going to be using a gri-gri to rappel, it’s absolutely essential that you learn this skill.
As I mentioned above, one of the major flaws of the gri-gri is that it can only perform single-strand rappels. This limits its functionality; double strand rappels are easier to set up and easier to retrieve your rope and can save you a lot of time. These are impossible to perform with a gri-gri, however, so learning how to tagline rappel is a must.
Tagline rappelling allows you to retrieve your rope once you’re finished. This is an important skill for two reasons:
- Climbing ropes are expensive, and you can’t go leaving them behind every time you want to rappel (plus, doing so would be really bad for the environment).
- In certain scenarios, such as rappelling from a multi-pitch, you’re going to need to be able to use the same rope multiple times.
For the above reasons, you should ensure that you know how to use a tagline before you consider bringing the gri-gri as your sole rappel device.
I’ve written a more detail article about it here, but I’ll summarize what it means to tagline rappel. Essentially, you tie a second, narrower piece of string to your main rappel line. Once you’ve finished rappelling, you use this this narrower cordelette to pull down the rappel line from where it’s secured to the anchors; this allows you to retrieve the rappel rope and start again.
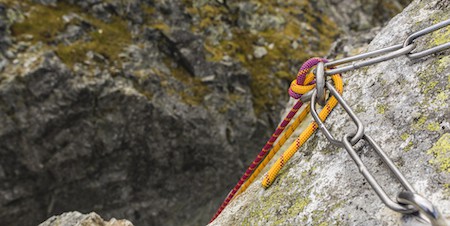
The hardest (and most dangerous part) or a tagline rappel is securing your rappel rope to the anchors. Because you intend to pull it down after you, you can’t tie the rope directly onto the anchors. Instead, you use a technique called blocking,where the rappel line is passed through your anchors and then tied into a knot.
This knot should be wide enough so that, when pulled in the other direction (back through the anchors), it does not pass through. This will secure the rope to the anchors, allowing you to rappel from it. Once down, you use the tagline to pull the rope in the opposite direction so that it passes cleanly through the anchors and is able to be retrieved.
As I said, tagline rappelling is a difficult technique that should be learned in a safe environment. If you intend to do your rappelling with a gri-gri, however, I would definitely recommend that you learn it.
Use a Backup

One of the most common misconceptions about rappelling with a gri-gri is that, because of the assisted braking feature, you don’t need to tie a backup. This is both wrong and dangerous, and I’m going to talk about why below.
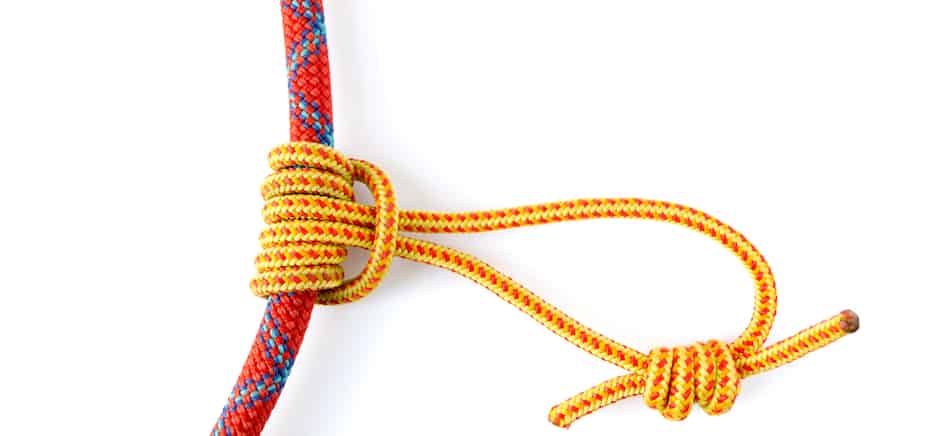
First of all, let’s discuss what a backup is. A backup is a knot or secondary device that is intended to stop your rappelling momentum if your primary device fails to. In most cases, you tie a specific knot (such as a prussik or a klemheist) to the rappel line and then secure that knot to your harness. These knots are designed to tighten when weighted. If something happens to you and you lose control of the rappel, your back will automatically tighten and hold you in place.
Now, a lot of people assume that this isn’t necessary for a gri-gri. The argument goes as follows: the gri-gri has an automatic braking system that will be engaged if you stop pulling down on the lever. If something happens to you and you let for of the lever, the gri-gri will stop your momentum for you.
This argument has two fundamental flaws:
- Narrower ropes tend to slip through gri-gri’s: Even if everything is set up properly, narrower ropes may start to slide out of a fully weighted gri-gri due to wear and tear on the camming system. A backup will prevent this from having any major consequences.
- Human nature can harm you: For a lot of people, rappelling is a scary activity. If you’re rappelling with a gri-gri and find yourself suddenly going too quickly, you might forget what you’ve learned and react out of fear. In this instance, a lot of people’s natural instinct is to grab whatever they’re currently grabbing tighter. If you do this to your lever, all you’ll succeed in doing is speeding up the rappel.
So, as you can see, the assisted braking feature of the gri-gri can’t be relied upon to help you if something goes wrong mid-rappel. Because of that, it’s best for you if you learn to tie a good backup knot in your rappel.
I have a full article dedicated towards backing up rappels, so I would highly recommend going to read that if you want to learn more. Most people use a prussik knot when rappelling, which is simple to set up and will work perfectly to catch you if you lose control. Learn to tie this knot in a controlled environment, and then use it whenever you rappel with a gri-gri.
Learn the Differences in Friction Control
While rappelling with a gri-gri is perfectly safe, it can feel different than your traditional rappel. This is mostly because of the camming system and how it affects friction within the device. To better explain what this means, let’s look at how rappel devices actually create friction.
Mechanical devices, like an ATC, have little metal teeth on them that the rope passes through and slows down. Depending on the angle of the rope, you can make it rub against these teeth to a greater or lesser degree, which will then have an effect on your rappel speed.
A gri-gri, on the other hand, has no such teeth. It creates friction via the camming system that we mentioned above. Because of this, however, it’s traditional methods for creating friction within the rappel aren’t going to work. This means that, if you’re used to rappelling with a device such as the ATC or giga-jul, you’ll need to re-teach yourself certain techniques before it’s safe to practice in the outdoors.
With a gri-gri, the only way to control friction is via the lever on the side that opens and closes the camming device. If you find yourself going too quickly and drop your hand (as you would to slow a rappel with an ATC), you’re not going to have any effect on the speed of the rappel. Instead, you need to learn to re-adjust the angle of the lever to reduce the amount of rope passing through the camming system.
So, what’s the best way to learn this technique? As always, you want to practice it in a safe environment where you can make mistakes without needing to live with the consequences. There are a few options for doing so:
- Practicing indoors: Indoor climbing gyms have pre-set top ropes, handy staff, and nice soft mats for you to land on. They’re a great place to learn techniques
- Back yourself up on top rope: Have your partner set up a top-rope belay that’s connected to you via an independent rope. If you mess up the rappel, they’ll catch you.
- Practice on easy rappels: A lot of this comes down to muscle memory and retraining your body’s automatic response. Perform several single-pitch rappels on easy terrain before you decide to try using a gri-gri for technical missions.
Use a Carabiner to Smooth the Rappel
Even once you’ve done all the practicing in the world, the camming device on a gri-gri can make it difficult to achieve a smooth rappel.
The problem here is that there’s no perfect width for you to hold the lever at to achieve the right speed. The optimal point is going to change based on a variety of factors including your weight, the width of the rope you’re using, how worn the gri-gri is, and whether your rope is dynamic or static.
Because of that, rappelling with a gri-gri can go from a smooth ride to a jerky descent very easily. You might find yourself stuck in a vicious cycle where you find yourself going too quickly, close the cam, and jerk to a stop, only to try again and end up (once again) opening the cam too wide and needing to slam it shut.
The answer to this issue is to create more friction in the system so that you can open the gri-gri to its full width and still rappel at a safe speed. To do so, you simply need to make it more difficult for the rope to pass through the gri-gri.
A good way to do this is via carabiners. The proper carabiner technique will cause the rope to pass through more points of friction, which will slow it down and prevent you from going too quickly. Doing so is a good way to achieve a smoother rappel.
Learn to Tie a Stopper Knot Mid-Rappel

This one relates to what I said above, about the rope managing to slip through a gri-gri even when the cam is completely closed.
Sometimes when rappelling you want to stop for prolonged periods of time. This could be because you need to retrieve gear, you’re trying to photograph your buddy as he sends his project, or you simply want to admire the view. Whatever the reason, being able to sit hands-free on a rappel is a luxury that I would highly recommend trying.
Doing so with a gri-gri, however, isn’t as simple as just letting go of the lever and trusting the device to do the rest. Gri-gri’s can experience rope slippage, especially if they’re worn down or you’re using a narrower cord. To prevent this, you need to learn to tie a mid-air stopper knot.
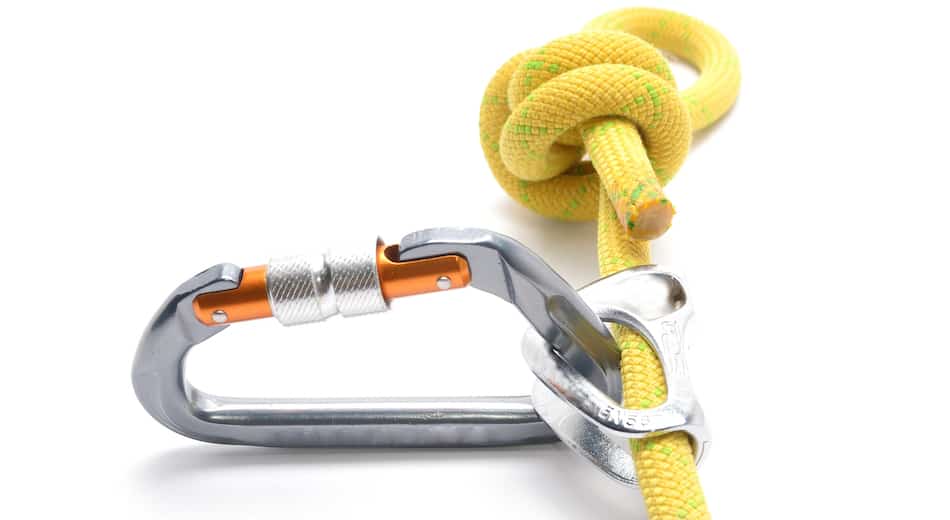
A mid-air stopper knot is one that you tie halfway through your rappel. This rope is thicker than the rappel device, so it can’t pass through; this brings your momentum to a halt and allows you to go hands-free without any worry of needing to trust the camming device.
Now, one of the best ways to do this is using the backup knots that we mentioned above. These knots will tighten around the rappel line and hold you in place while you go about your business. Another way is to physically tie a knot in the slack below your rappel device to stop it from passing through (a technique known as ‘tying off’). For rappelling with a gri-gri, I would recommend using the former method of having a backup in place that you can rest on if you ever want to go hands free.
Conclusion
There we go! Those are my tips on using your gri-gri to rappel. As I said, there are some important points that you need to be aware of, and some advanced techniques you should learn before rappelling with a gri-gri. That being said, though, the gri-gri is a perfectly safe device to use as long as you know what you’re doing.
As always, these tips are meant to inform and educate and are not intended to be actionable pieces of advice. Do your own research and seek expert advice before you try anything in the mountains. Have fun and stay safe!
