
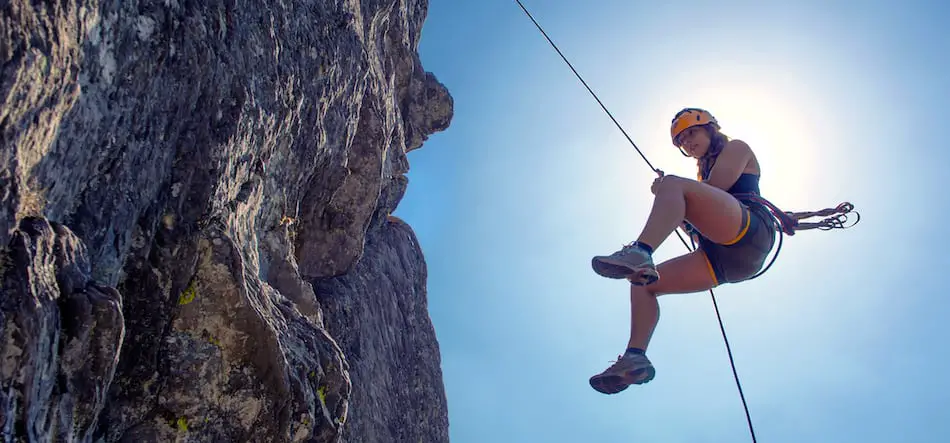
Whether you’re climbing, caving, canyoning, or any other range of activities, rappelling is an essential skill that you should learn. I’ve created the following guide to teach you everything you need to know about rappelling.
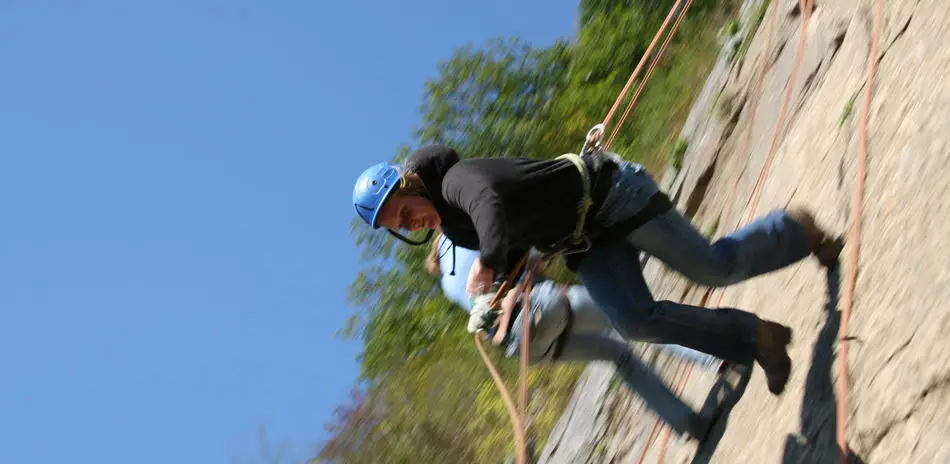
Rappelling is the art of lowering yourself down a rope in a controlled manner. To rappel, you need to connect yourself to the rope through some mechanism that creates friction to slow you down. Doing so allows you to lower yourself to the ground in a controlled manner, ensuring your safety while descending.
To perform the above functions, you need to use some kind of rappelling device. Essentially, the rappelling device is something that you connect to the rope which creates varying levels of friction depending on what setting it is in. As the user, you control the level of friction. This allows you to hold yourself in place on the rope (lots of friction), lower yourself slowly through technical terrain (a medium amount of friction), or speed up your descent (low friction).
In the following guide I talk about what rappelling is, how to do it, what gear you’ll need, when you’ll want to rappel, and how you can learn it. Keep reading to learn everything you need to know!
What is Rappelling?
As I said above, rappelling is the art of lowering yourself down a length of rope in a controlled manner. Doing so allows you to descend steep terrain with great speed and safety. This is useful for activities such as rock climbing, canyoneering, alpinism, and so forth. Rappelling can also be done as a stand-alone activity if you’re looking for a safe but fun way to explore the outdoors.
The main advantage of rappelling is that is allows you to lower yourself safely down pieces of terrain. While other techniques may get you down the same terrain, they all have some drawbacks: their either more dangerous than rappelling, or they require a climbing partner. Rappelling allows you to do it completely independently and in a safer manner.
To better understand what it is and why it’s used, let’s look at rappelling compared to some similar activities:
- Rappelling vs being lowered: Getting lowered a partner, such as you would in a climbing gym, is the most common alternative to rappelling. However, this only works once one person as made it to the bottom, so you can’t do it in every scenario. Plus, you need a partner to do this, whereas you can rappel by yourself.
- Rappelling vs down climbing: Down climbing is a potential alternative to rappelling if the terrain allows it. Doing so is much more dangerous, however, because you’re constantly at risk of falling. Additionally, down climbing takes much more time than rappelling.
Rappelling was first used in the 1800’s as mountaineering became more and more popular. Originally, it was a technique used by alpinists to lower themselves sections where they didn’t want to ‘down-climb’ due to the danger presented. Looking for a safer and faster alternative, these men and women discovered the art of rappelling.
How to Rappel
Now that we know what rappelling is and why you’ll use it, it’s time to talk about how to actually rappel. For starters, let’s go over the gear you’re going to need:
- A rope
- A harness
- Some kind of rappel or belay device.
That’s it! Later in this guide I go into more detail about those items (plus some other ones), but that’s essentially everything you need in order to perform your rappel. Now let’s look at how those three devices work together.
To explain how the rappel works, it’s easier to envision yourself standing at the top of a short cliff. In your backpack, you have the three items mentioned. How do you set up the rappel?
First comes the rope. The rope attaches to an anchor at the top of the cliff (such as rappel rings that have been drilled into the rock) and hangs down the entire length of the cliff. It is this piece of rope that you’re going to be rappelling from.
Next comes the harness. Your harness goes around your waist and legs. It’s what holds you in place when you’re suspended in mid-air.
Finally, there’s the rappel device. The rappel device attaches to the rope in a way that creates friction (the exact method varies from device to device). The rappel device also attaches to your harness, so that you’re connected to the rope.
In summary:
- The rope hangs over the cliff and creates a pathway to the bottom.
- The rappel device attaches to the rope and allows for you to control the speed of the rope getting passed through (and therefor the speed of your descent).
- Your harness attaches to the rappel device.
- You attach yourself to the harness. Now, you are set to lower down the rope.
If it makes it easier, you can always visualize using a metaphor. Your rope is like a road, because it creates a path from point A to point B. The rappel device is like a car: it controls the speed you travel on said road. Finally, the harness would be like your seatbelt, as it allows you to use the car (rappel device) safely and securely.
So, now we know how everything works. You’re familiar with the theory of rappelling. How do you actually execute a rappel?
Use the following steps to rappel:
- Attach our rope to the anchors
- Ensure that your harness is on safely
- Attach your rappel device to the rope
- Attach yourself to the rappel device via your harness
- Grab a hold of the rope and increase it to maximum friction. The rope should not be able to pass through the device at this stage.
- Slowly, re-adjust the rope so that there is less and less friction in the device. At this point, you should start to move
- Adjust the friction until you get to a comfortable speed and then lower yourself down the rope.
Seems pretty simple, right? The above list is a simplified version of what you need to do to rappel. Below a more comprehensive, step-by-step guide of the actual process that you’ll need to follow to rappel.
Just a heads up: this list contains more technical jargon that you may not recognize. That’s okay! If that’s the case, just head over to my glossary or do a quick google search to see what it means.
The step-by-step rappelling process:
- Secure yourself to the anchors using a PAS or daisy chain
- Tie an overhand knot in the rope and attach it to your harness with a carabiner
- Thread one end of the rope through the rappel rings
- Pull it through until the middle point of the rope is centered between the two rappel rings.
- Tie a stopper knot onto both ends of the rope
- Attach your belay device to the rope
- Attach the belay device to your harness using a locking carabiner
- Unclip and untie the overhand knot
- Throw the rope down
- Double check that both ends of the rope are touching the ground
- Tie a backup knot (prussik or klemheist) and secure it to your harness
- With your PAS still attached to the anchors, weight the rope
- With the rope weighted, check that:
- The rope is centered
- Your carabiner is locked
- Your backup knot is secure to your harness
- Both ends of the rope are on the ground
- You did, in fact, tie your stopper knots
- Unclip yourself from the anchors
- Slowly let out friction in the device until you start to move
- Lower yourself to the ground
- Disconnect the rappel device from the rope
- Disconnect your backup knot
- Untie both stopper knots
- Pull the rope down from the anchors.
So, there we go! That’s my start-to-finish process as to how you would perform a rappel.
Note: the above rappel is for a single-pitch, two-strand rappel (the most common and simple rappel to perform). Different scenarios will require slight modifications to the steps I just outlined.
When do you use rappelling?
Now you know how to perform a rappel, so let’s talk a little bit about when you might do so. I’ve broken down some common categories below:
Rappelling While Climbing
Climbers rappel all the time. Once you get to the top of a route, you essentially have three options: rappel down, get lowered, or walk off. A lot of the time, walking off the top of a route isn’t an option, so you’re left with either rappelling or lowering.
The decision as to whether rappel or lower is a polarizing one, and everyone has their opinions as to what the correct strategy is. On single pitch sport climbs, it’s often just as easy to have your belayer lower you down once you’ve reached the top. On multi-pitch climbs, however, setting this up might not be practical, and rappelling is often the only option you have. In these scenarios, there will either be pre-set rappel stations (on a sport climb) or you’ll need to place your own protection (on a trad climb).
Mountaineering
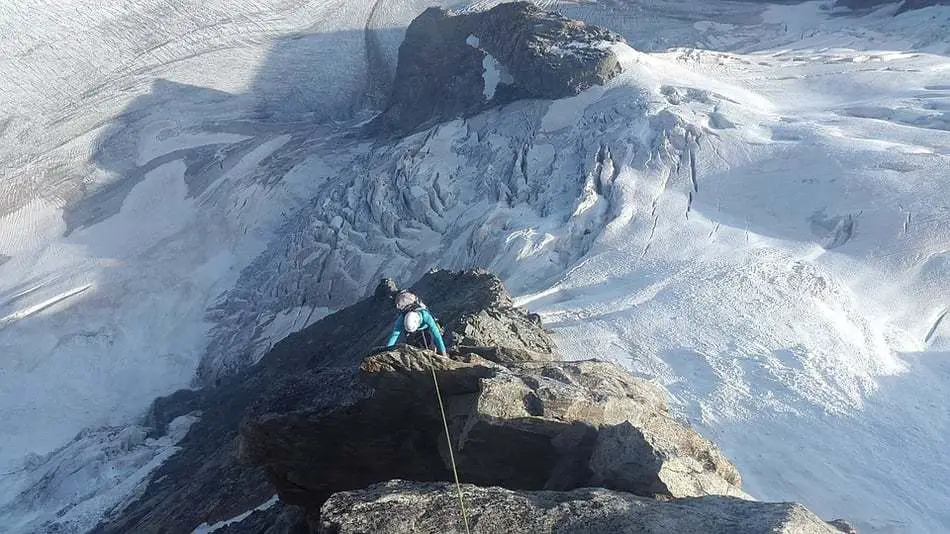
Rappelling in mountaineering or alpinism is often the same as rock climbing: it happens on the descent, once you’ve either summitted the mountain or decided that you need to turn back.
The major difference here is that, on most alpine routes, there aren’t going to be defined anchor points where you can tie in. This makes the process much more complex. Additionally, you may need to contend with snow and ice along the way.
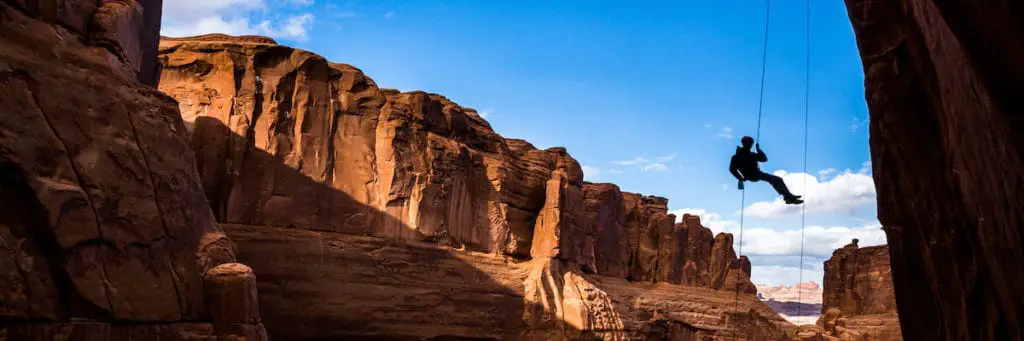
Canyoneering
Rappelling while canyoneering is one of the main activities that you’re going to perform. When descending a canyon, you’re almost guaranteed to find yourself in a scenario where the ground is too steep to walk or downclimb. In these scenarios, you need to rappel past the trickiest sections to ensure you can get to the bottom of the cave. Sometimes there are bolts in the wall to rappel from, while other times you may need to make your own anchors.
Canyoneering rappels tend to be more difficult than normal rappels. You’ll need to contend with natural hazards (like waterfalls, wet rock, and rapids), along with varying terrain and inclement conditions. Before you go canyoneering, you should ensure that you have experience with different types of rappels. You should also make sure you bring the right gear, from a dry-treated rope to a canyoneering-specific rappel device.
Caving
Rappelling while caving is fairly simple to canyoneering. Once again, you’re going to be rappelling down sections of the cave that are too steep to walk down. Your ropes will be secured either to pre-existing anchors, natural features, or temporary protection.
Although you’re less likely to have to contend with waterfalls (for most caves— some of them do have running water), caving rappels present their own, unique challenges. For starters, it’s going to be really, really dark, so it’s harder to see everything. The rock will probably be wet and slipper from condensation, and there’s going to be mud everywhere that gets on your rope and makes it harder to control your rappel. Specialized gear is recommended in this scenario.
Rappelling as a Stand-Alone Activity

For those who aren’t interested in engaging the other stuff but want to experience a bit of a thrill, rappelling can be a great way to get outdoors. Lots of tourist destinations like Maui, Cancun, and Florida offer rappelling tours, where you go to a pre-established location with an experienced company. This company will supply you with all of the equipment that you need to perform your rappel; they’ll also have instructors to walk you through all the steps necessary to perform your rappel.
Often times you’ll actually perform several rappels in one trip. The companies may also incorporate hikes, swimming, and picnics in scenic locations to enhance the experience for you. Going with a tour company will provide you with a safer, easier experience that allows you to enjoy some beautiful locations in a pretty unique way.
Different Rappel Techniques
We’ve covered how to rappel and some different situations in which you’ll want to. Now, let’s talk about the different rappel techniques that you’ll be using. (Hint: for a more in-depth look at this, check out my guide here)
Double Strand Rappels
The easiest form of rappelling is the double-strand rappel. In this technique, you have two parallel pieces of rope that you pass through your belay device. You then hold both of the ropes at the same time while you lower yourself towards the ground with your face and chest pointed upwards.
Double strand rappels have several advantages. They allow you to easily pull your rope down afterwards, because the two strands of rope will be threaded through the anchors. This means no knots or blocking mechanisms, which also serves to make the rappels safer. Finally, the two ropes are often easier to grip, which can make the rappel easier to perform.
The main disadvantage of these rappels is that not all devices are compatible with them. Some rappel devices, like the Petzl Gri Gri, can only fit one strand of rope through the system, so there may be situations in which you can’t perform a double strand rappel. Additionally, doubling up your rope like this also halves the distance you can rappel, so on longer stretches this might not be an option.
Single Strand rappels
Single strand rappels are, as the name might imply, very similar to a double strand rappel except for the fact that there’s only one piece of rope that you thread through the belay device. This can create less friction within in the system, meaning that the rappel can be harder to control.
The advantage of a single strand rappel is that you can use it with just about any rappel or belay device out there, so you’re never going to find yourself stranded without a way to get down. Additionally, it allows you to extend the length of your rappel by twofold, because you don’t have to double your own rope through the rappel anchors. This comes at a cost, however, as it is much harder to attach your rope to the anchors in a way that will allow you to retrieve them. To get around this, you need to use a technique known as blocking or perform what’s called a tagline rappel. Both of these increase the risk of your rope coming loose from the anchor, which serves to make your rappel slightly riskier.
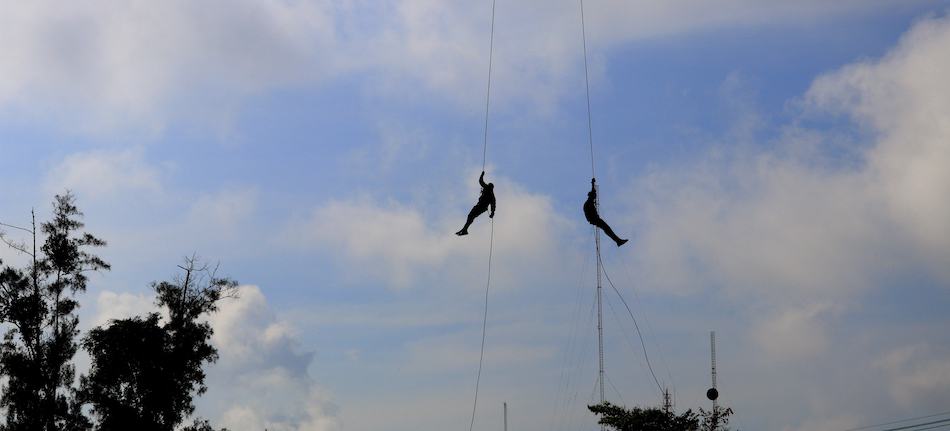
Australian Rappel
An Australian rappel is one where you descend face-first towards the ground, with the rope anchored to your waste and your feet against the surface you’re rappelling on. This method allows you to gather much more speed than a standard rappel; if you so want you can actually run down the surface of the wall, letting the rope play out as much as you please.
To perform this type of rappel, you have a couple of options. You either attach the belay device as regular and then rotate your body, using your core and your feet to keep you in place, or you wear your harness backwards. Doing so, however, puts you at greater risk of a back injury, and it can put unnecessary strain on your equipment.
These drawbacks mean that Australian rappelling is looked down upon by many members of the climbing community. In a safety-focussed sport, where many people try to mitigate as much risk as possible, Australian rappels don’t have a whole lot of popularity. However, if you’re fairly confident in your skills and looking for a bit of excitement, Australian rappels can be a lot of fun. They can also be handy in scenarios where you need to get down quickly.
Simul-Rappels
Technical, risky, and difficult to pull off, simul-rappels are used by the elite climbers of the world to decrease the amount of time it takes to descend from a multi-pitch route.
In a simul rappel, you set up the rope as you would a standard double-strand rappel, except you only connect your rappel device to one strand. Your partner connects to the other strand and you descend at the same time, with each person working to counterweight the other so that the system stays in balance.
Doing so allows both parties to descend simultaneously, which saves time and means you don’t spend a long clipped uncomfortably into anchors. These advantages, however, come at significant risk. If one climber messes up, the consequences can have a massive negative effect on their partner. This was highlighted very recently in the death of Brad Gobright, who fell from a simul-rappel after his partner forgot to tie a stopper knot and accidentally abseiled right off the end of the rope.
Simul-rappels can save you time and are far easier than setting up blocking, but you should always make sure that both you and your partner know what you’re doing before you commit to one.
Rappelling without a device (friction rappels)
If you’re either a) stuck in 1803, or b) find yourself in a very, very sticky situation, you may find it necessary to rappel without a proper device.
In the heydays of mountaineering, when the sport was just being discovered and people were figuring out what worked and what didn’t, this is how all rappels were performed. Instead of using a device and a harness (neither of which existed at the time), alpinists instead wound the rope around their bodies in a way that both created friction and kept them attaches long enough to get to the ground.
Now, obviously, there are significant disadvantages to this strategy: it’s more dangerous, it’ll leave you with rope burn, it’s harder to control, and there’s almost no scenario in which it’s a good idea. Carrying some paracord and a lightweight device on you is going to be a lot better of a backup plan than trying to learn to perform friction rappels.
The most common form of friction rappelling is a Dulfersitz, where you pass the rope across you hip, loop it around a leg, and finally wrap it around your chest. This allows you to lower yourself while staying secure in the rope, although it’s going to be pretty uncomfortable with all that friction against your skin. Again, I don’t really recommend this type of rappel.
What do you need to rappel?

We’ve now talked about how to rappel, when you’ll need to rappel, and some of the different methods you can use to safely lower yourself down the rope. Will all of that covered, let’s talk a little bit more about what gear you need for this activity.
For those who want a more comprehensive guide, check out my article here about what gear you need, or read this guide to learn everything you need to know about what to wear rappelling.
As I said above, there are three main pieces of gear you need to rappel with:
- A rope
- A harness
- A belay or rappel device
Rappelling Ropes
The question as to what rope you want to use while rappelling depends a lot on what activity you’re doing. In general, any rope that’s designed for climbing is going to work for rappelling, because it will be strong enough to support your weight and will likely also be the right size to fit into your rappelling device (most devices work with ropes that are between 8-11mm wide).
That being said, there are some specifics that you should be aware of. For rappelling-specific activities, static ropes will perform better than dynamic ones will. Because they don’t stretch as much, static ropes make it much easier to control your speed on the descent. They’re also cheaper than dynamic ropes are.
Now, keep in mind, there are likely going to be situations where you need to rappel with a dynamic rope. If you’re rappelling from a sport climb, you’re likely not going to want to bring two ropes up with you. Instead, you’re going to belay your partner with the dynamic rope and then use it on the descent. Because of this, it can be a good idea to practice rappelling with a dynamic rope beforehand so that you get used to the motions.
Another thing you should worry about is whether or not the rope will be getting wet. When caving or canyoneering, there’s a good chance that you’re going to run into a situation where it’s impossible to keep your rope dry. Now, when climbing, this is a serious issue. For rappels it’s not as big of a concern, but it can still be a good idea to bring a dry-treated rope if you’re going to be exposing it to water for long periods of time.
Check out this article about the best rappelling ropes!
Rappelling Harnesses
When choosing a rappel harness, the big things you want to worry about are safety and comfort. If you’re sitting in it for a full day, picking a good harness can be the difference between an enjoyable outing and a blister-riddled nightmare.
What harness qualifies as the most comfortable is going to vary from person to person, but there are a few pieces of advice I can think of:
- Spend a little extra money: Intro harnesses tend to be less comfortable that some of the nicer models are.
- Don’t go too lightweight: Lightweight harnesses are designed for mountaineering and alpinist pursuits. They’re usually meant to be worn over multiple layers of clothing, and comfort isn’t one of the major concerns that are put into them.
- Account for your clothing: What you’re wearing on your legs has a lot of influence on how comfortably the harness will fit. If you try it out in jeans but the go climbing in shorts, you might find that the harness isn’t as comfortable as you thought it was.
Aside from that, buying a harness comes down mostly to personal preference. For rappelling, most people use standard waist-and-leg climbing harnesses. For those looking for a little more security, or people who are travelling with kids, you can look into purchasing a chest harness, as this can make long rappels more comfortable.
Check out my review of the best rappelling harness here!
A Rappel Device
Choosing your rappel device is an important step before you head out into the mountains. Most belay devices will function just fine for rappelling, but for more technical pursuits, you might want to buy a abseiling-specific device.
As with the rope, in certain scenarios you’re just going to have to make do with what you’ve got. If you climb a 13-pitch sport route with a gri-gri, you can either haul up a secondary device with you or just use the gri-gri to rappel. Similarly, if you’re just going to use rappelling as a secondary activity, it’s probably not worth going out to purchase a fancy rappel device.
If you’re engaging in a more rappelling-heavy activity (like canyoneering), it can be well worth it to spend the time and find a device that really works for you. There are some devices out there that have automatic braking features, while others allow you to add additional friction mid-rappel. Investing in a good device can make your rappels both safer and more enjoyable.
Read about the best six rappelling devices here!
Other Gear
In addition to the above items, there are some other things that you should always be sure to bring with you while rappelling:
A helmet
Although you don’t strictly need a helmet to rappel, it’s something that you should always bring along. Helmets protect you from rockfall, mishaps, and all other sorts of injuries, and they can be invaluable for keeping your safety intact.
Any climbing helmet will also serve to protect you while you’re rappelling. Other helmets like ski helmets, bike helmets, or sports gear probably aren’t rated for the proper type of impact that you need to protect against, so I wouldn’t recommend bringing them with you.
Check out my personal helmet recommendation here!
Clothes
Now, obviously, you need clothes when you rappel. Picking the right clothing, however, can go a long way in ensuring that you have an enjoyable when you’re rappelling.
Choosing what to wear when rappelling involves balancing comfort with practicality. You want clothing that’s comfortable and allows for mobility, while at the same time not being so loose-fitting that it will get in the way. Other factors, like sun protection, weather resistance, and how well it can handle long days of activity should also be of consideration.
Miscellaneous Gear
Bringing along the proper knick-knacks and odd bits can help to make your rappel easier and safer. Namely, you want to make sure you have:
- Paracord
- Spare carabiners (2 locking, 4 non locking, at a minimum)
- A PAS (Personal Anchoring System)
- A knife
- A backpack to carry water, sunscreen, and extra layers
Learning how to rappel

So, we’re now reaching the end of the guide. We’ve talked about what rappelling is, how to perform it, what techniques to use, and what gear you need to execute those techniques. Now let’s touch quickly on how to learn rappelling.
Right off the bat, I need to make it clear that this guide is a starting point only. You should not be using it as the only educational source you consult before you head out rappelling. Doing so could have serious consequences towards your health and safety, and I am not liable for any actions you take after reading this guide.
As with most other things, there are two main things you should do to ensure that you properly learn to rappel: practice it in a safe environment and go with someone more experienced than yourself.
The key to building a safe environment to practice rappelling is to design a system that minimizes the consequences of any mistakes you might make. This could mean going through the motions while on flat ground, getting a few laps in at an indoors gym, or setting up a top-rope backup system so that you’ll get caught if you mess up.
Going with someone more experience than yourself allows for hands-on instruction in a way that’s much more comprehensive than you’re going to get from an online guide. Whether this is a friend of yours who’s a veteran rock climber or a professional instructor who can walk you through the exact steps you need to rappel, having a more experience party can be a lifesaver when you’re just learning the ropes.
Conclusion
So, there we go! That’s my complete guide to rappelling from top to bottom. Please remember that rappelling is a dangerous activity. There are external factors that can injure you even if you take all of the proper safety steps. Additionally, reading a guide online DOES NOT prepare you to go rappelling in any way, shape, or form. Do your own research and seek expert advice. I’m not liable for any actions you take after reading this guide.
Be sure to check out the rest of my website for more in-detail looks on some of the topics we covered! As always, stay safe and have fun out there.